Connecting Microsoft 365 (Outlook) to ISPBox for Sending Emails
Published Feb 07, 2026
Updated Feb 07, 2026
3 min read
Connect Microsoft 365 (Outlook) to ISPBox to send emails from your domain, configure Graph delegated permissions, and enable shared mailbox sending with Send As.
Connecting Microsoft 365 (Outlook) to ISPBox for Sending Emails
Use this guide to connect Microsoft 365 so ISPBox can send email from your domain.
What this setup enables:
- Sending emails from ISPBox through Microsoft 365.
- Token refresh without frequent re-login.
- Optional sending from shared mailboxes (with proper permissions).
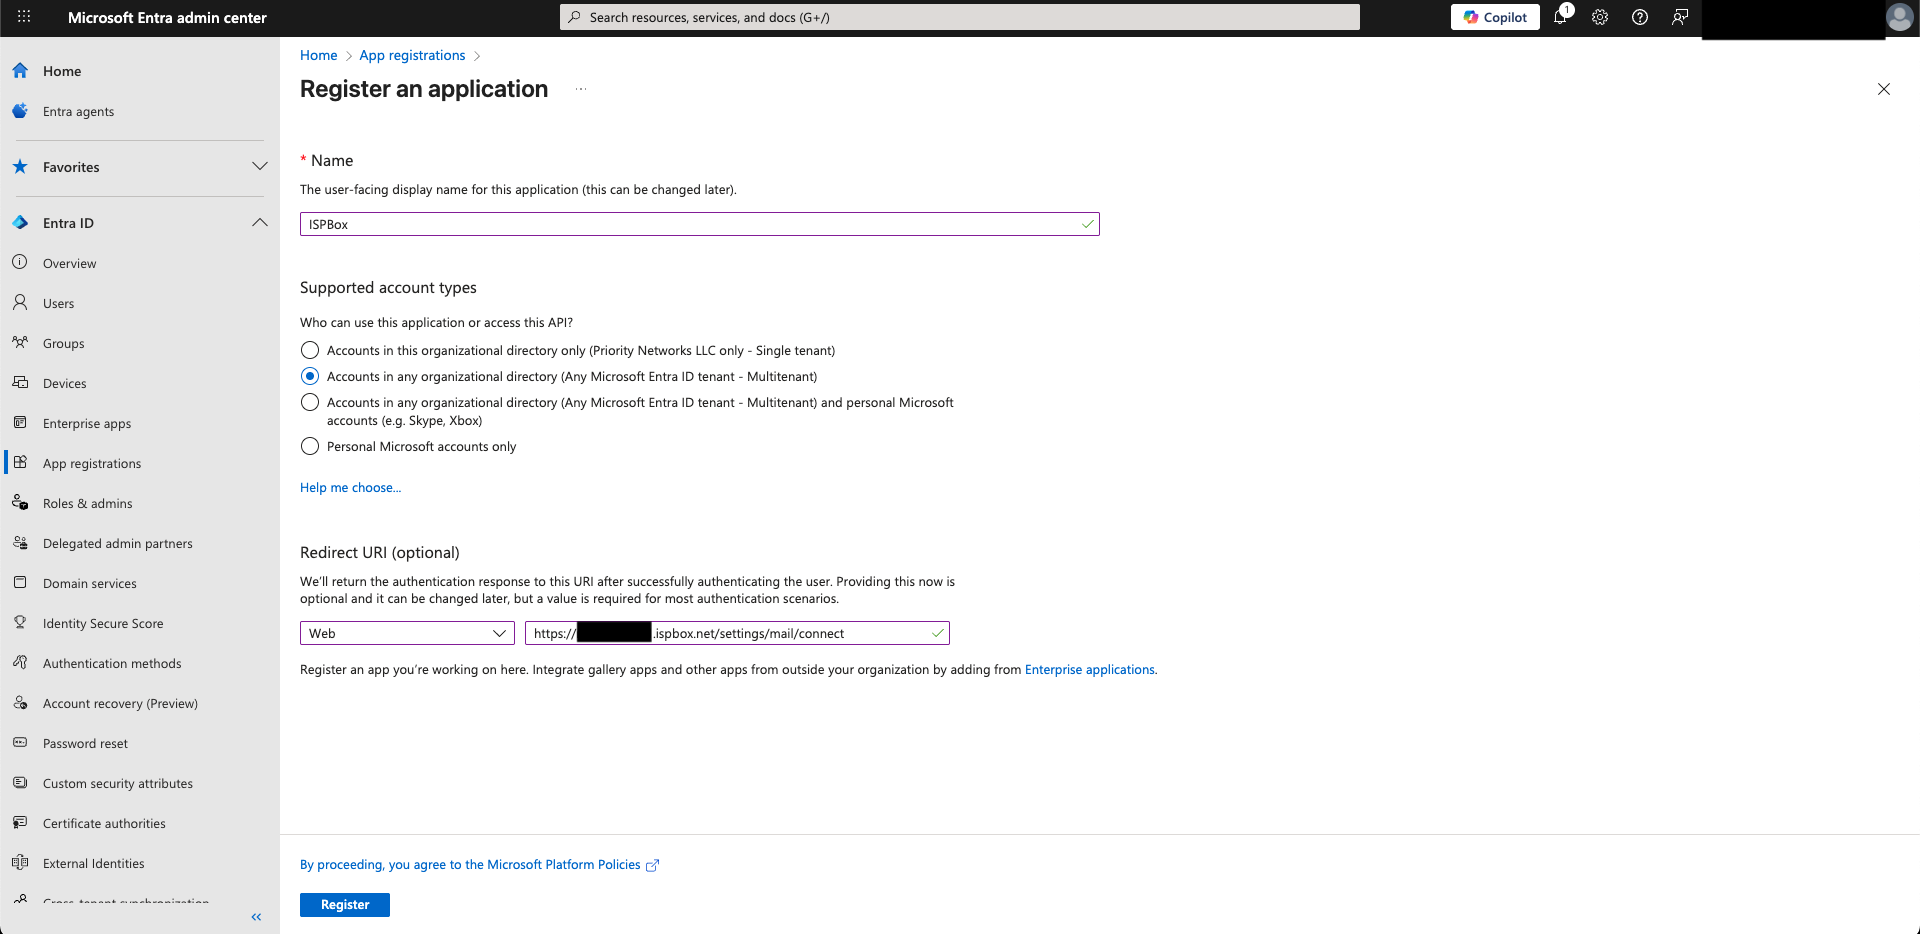
Step 1: Create an App in Microsoft Entra
- Open Microsoft Entra Admin Center.
- Go to App registrations -> New registration.
- Set:
- Name: ISPBox
- Supported account types: Accounts in any organizational directory (Multitenant)
- Redirect URI type: Web
- Redirect URI value: your ISPBox redirect URL from Settings -> Mail (example format: https://YOUR-SUBDOMAIN.ispbox.net/settings/mail/connect)
- Click Register.
Step 2: Create a Client Secret
- Open Certificates & secrets -> New client secret.
- Set:
- Description: ISPBox
- Expiry: 24 months (recommended)
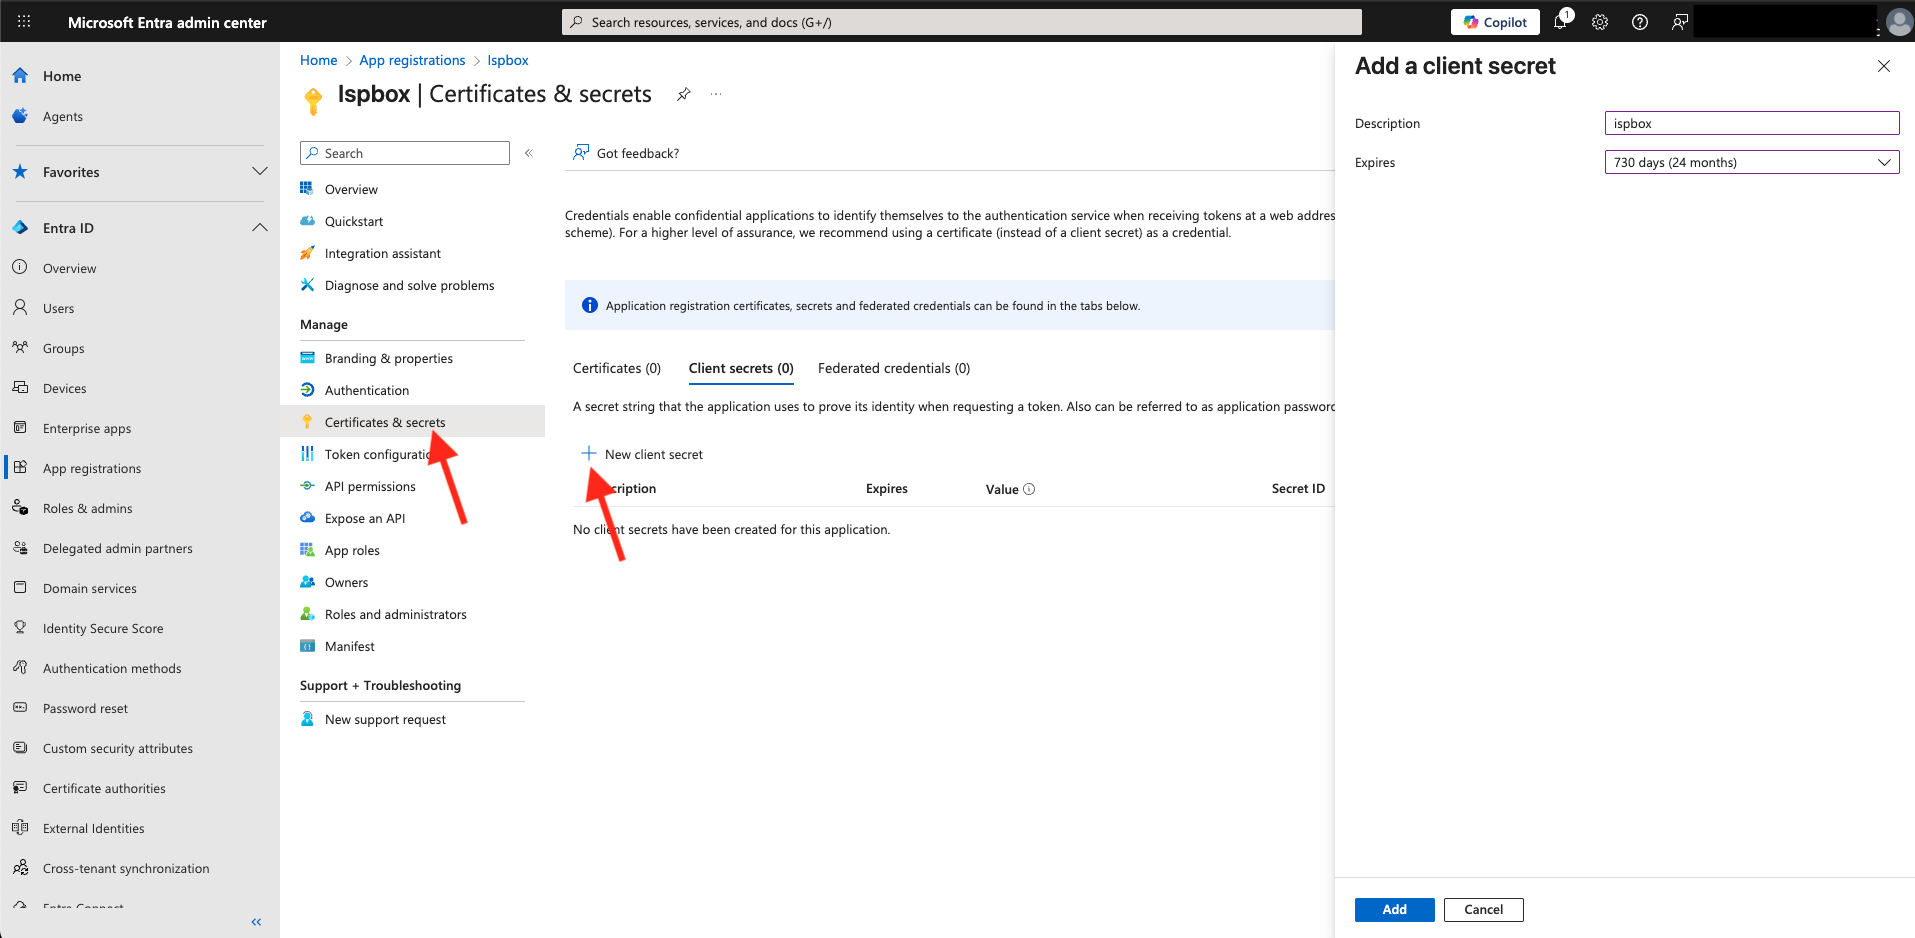
- Click Add.
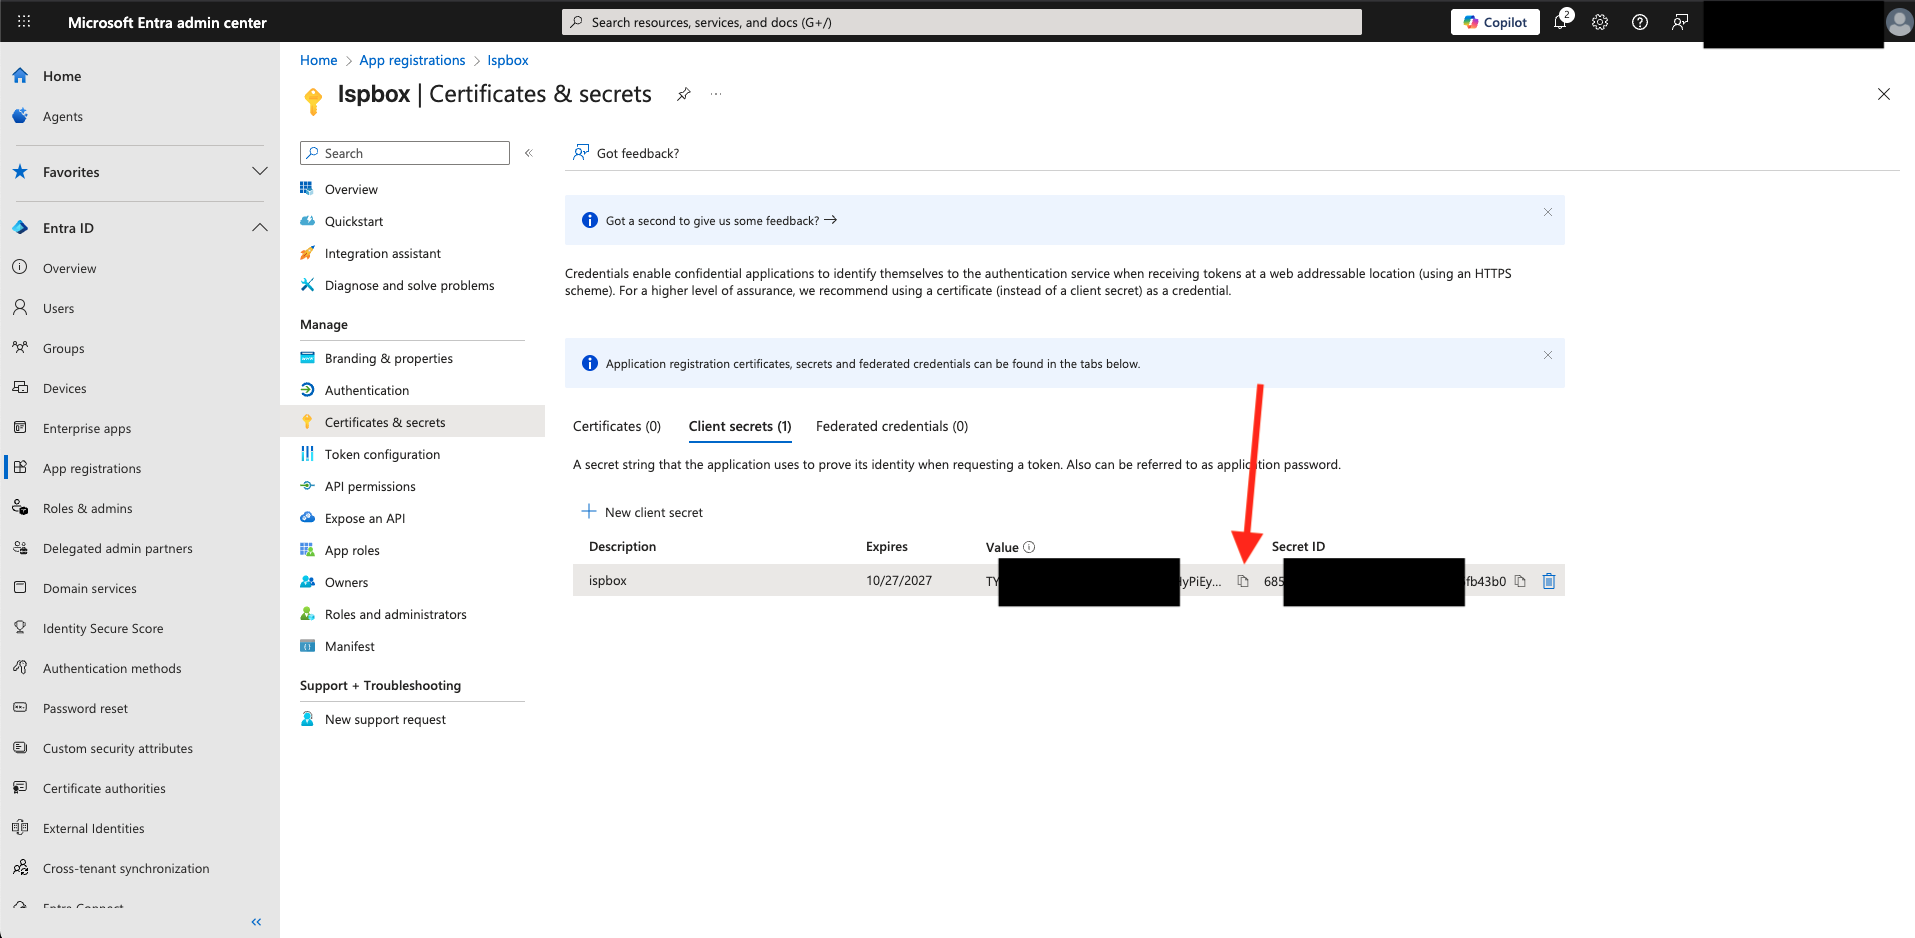
- Copy the Secret Value immediately.
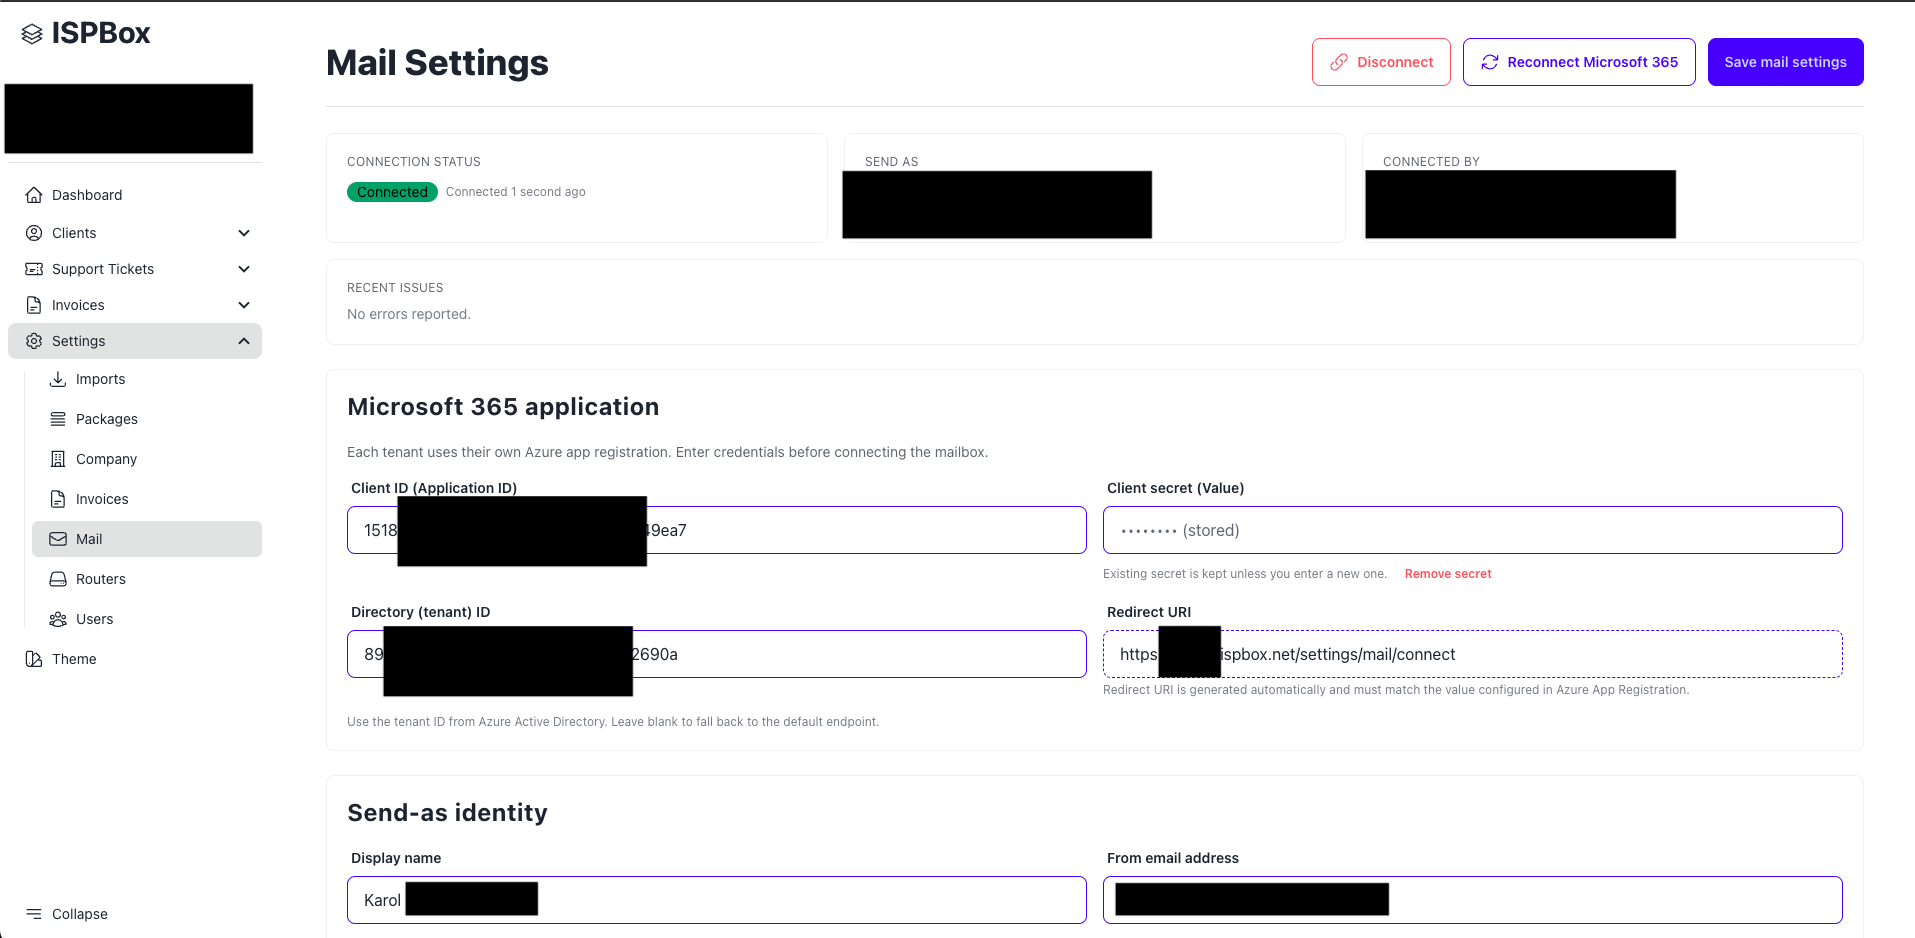
- Paste it in ISPBox: Settings -> Mail -> Client secret (Value).
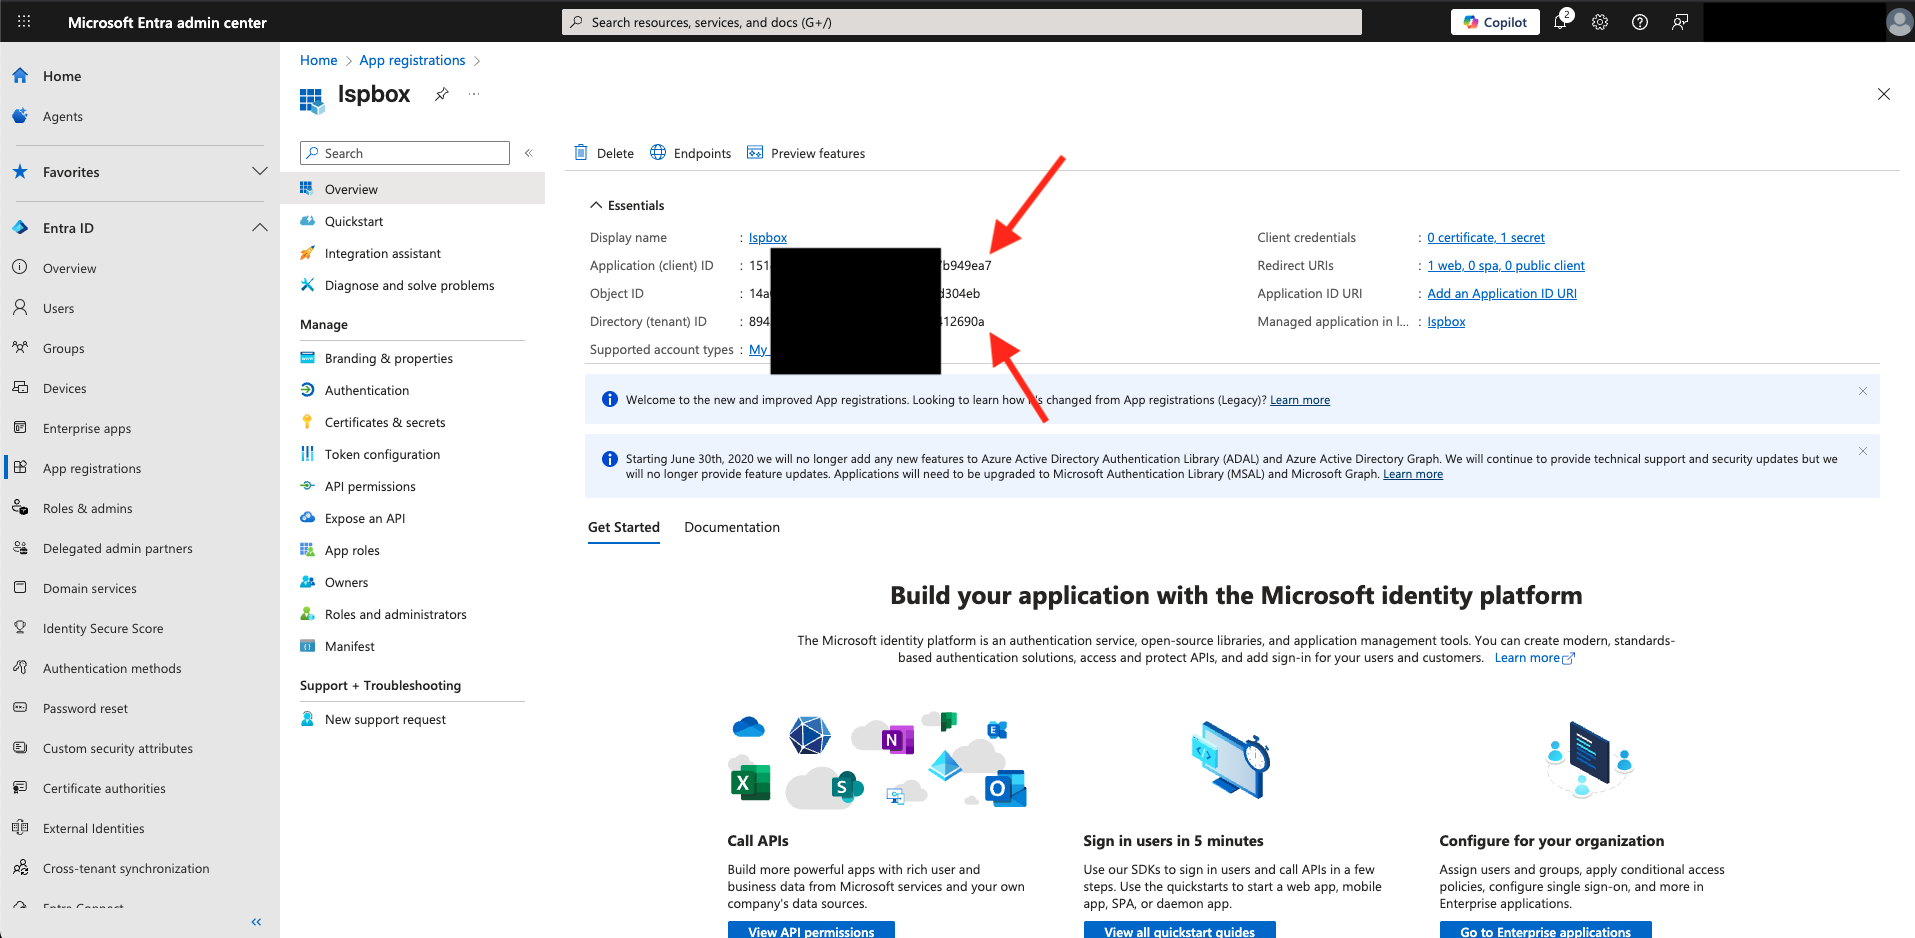
Step 3: Copy App IDs to ISPBox
From the app Overview page, copy:
- Application (client) ID -> ISPBox Client ID (Application ID)
- Directory (tenant) ID -> ISPBox Directory (tenant) ID
Step 4: Configure Microsoft Graph Permissions
- Go to API permissions -> Add a permission.
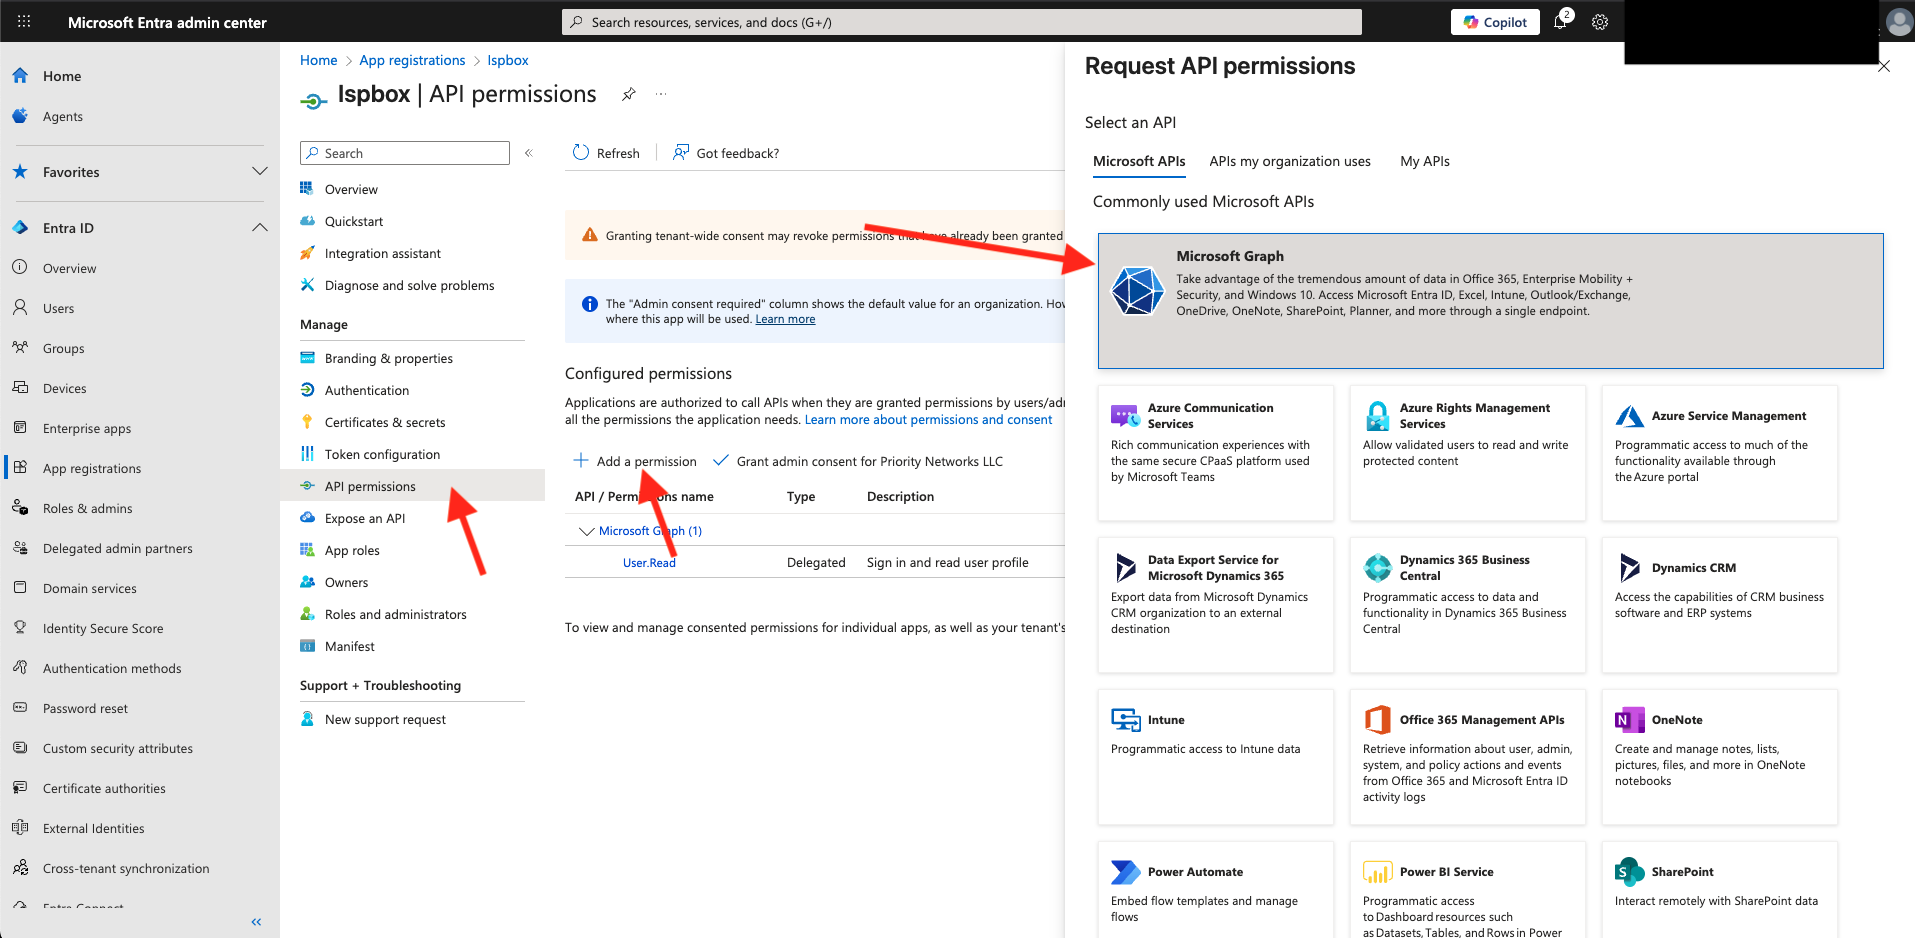
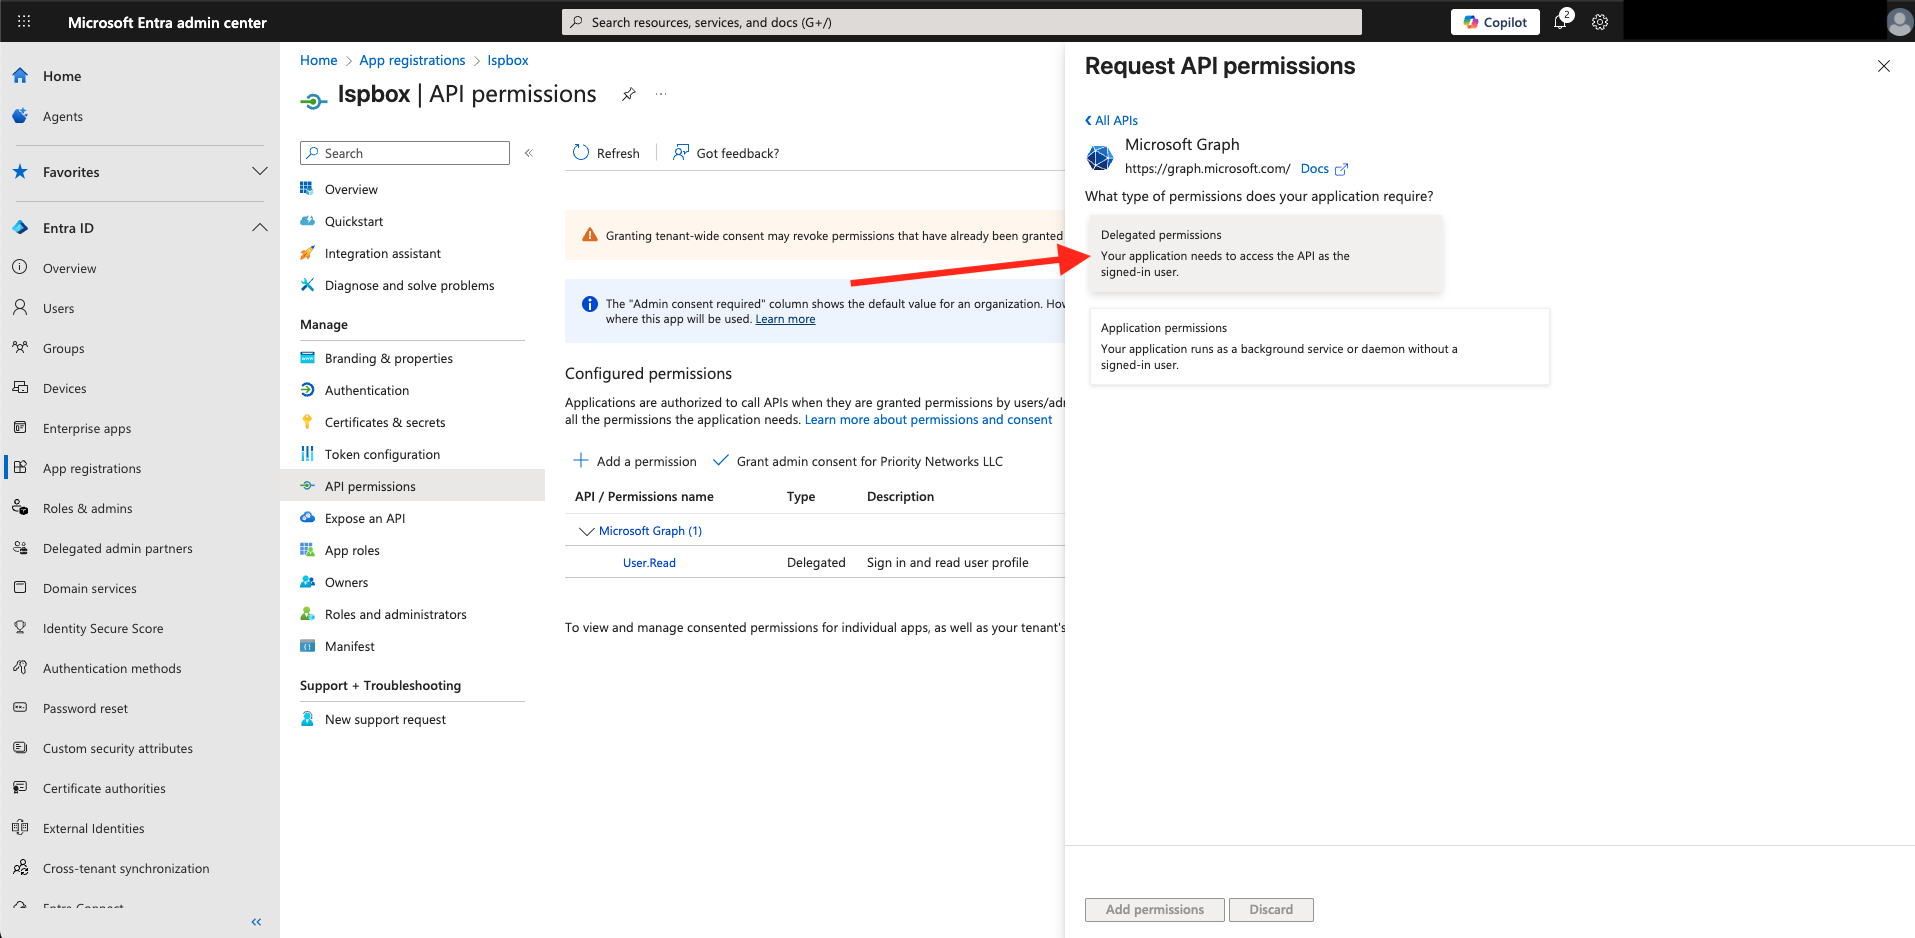
- Choose Microsoft Graph -> Delegated permissions.
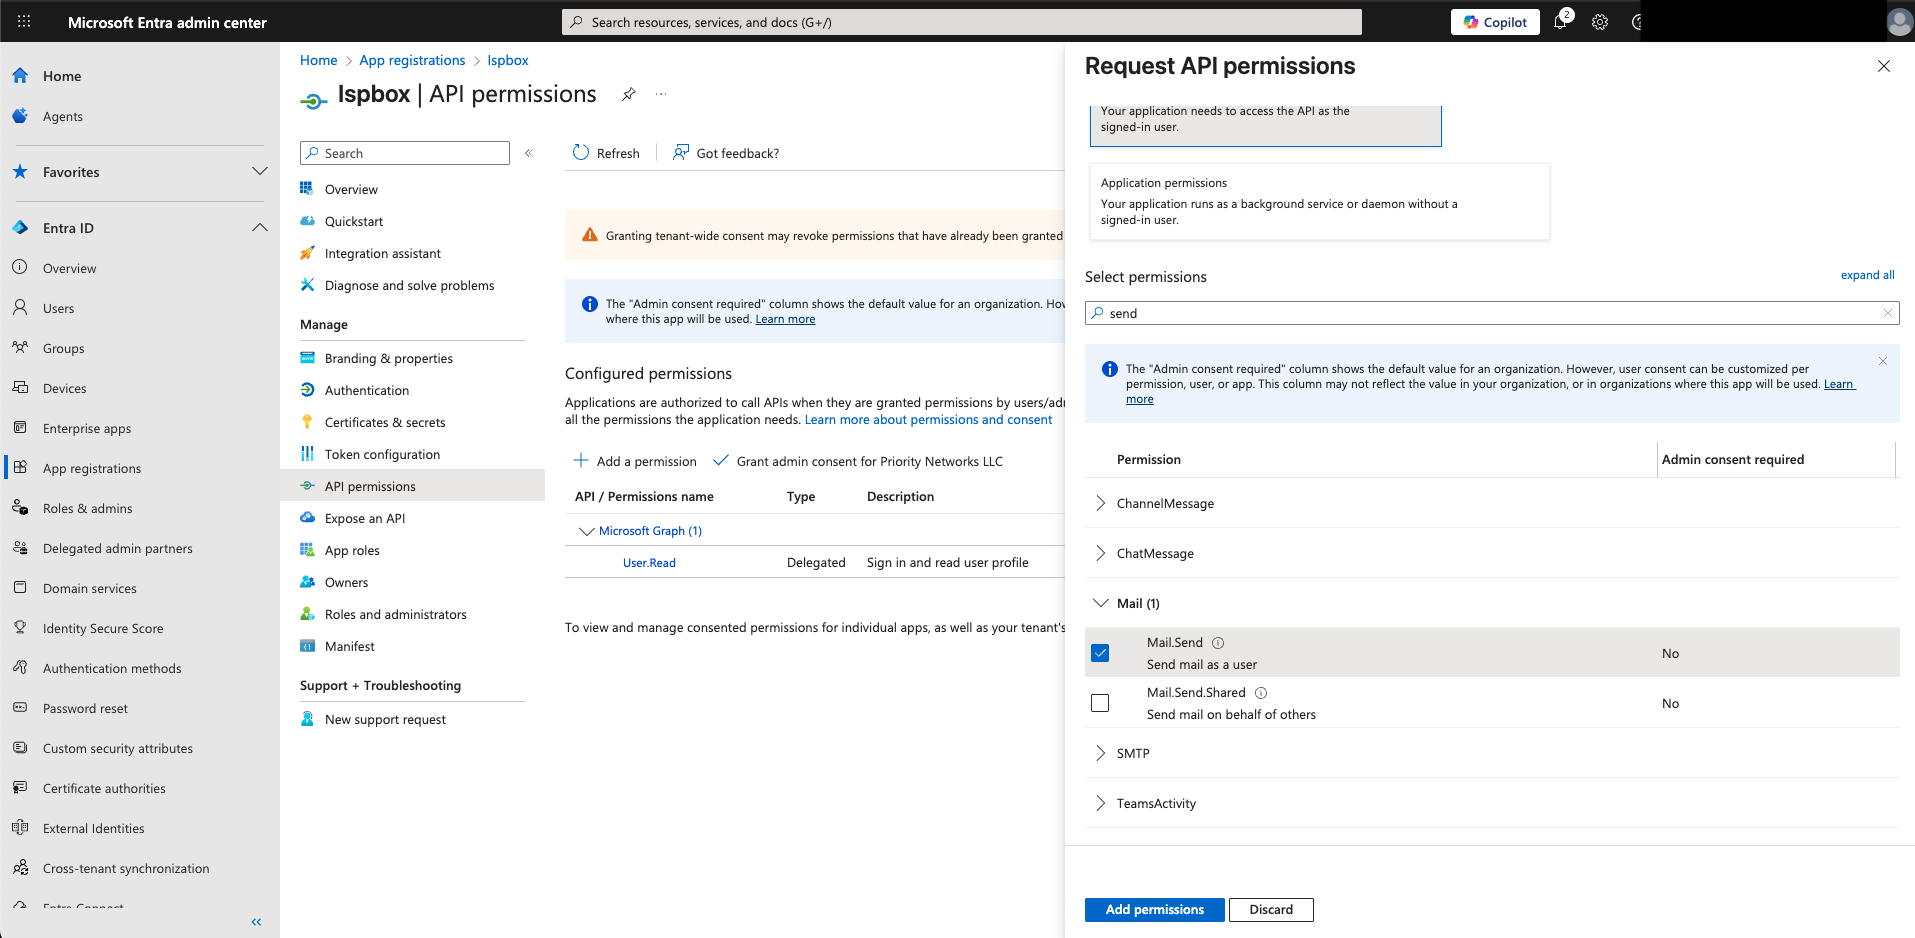
- Add:
- Mail.Send - Allows ISPBox to send emails on behalf of the signed-in user or shared mailbox.
- Mail.Send.Shared - Allows sending from any mailbox the user has access to, e.g., shared mailboxes. Add this to support Send As / Send on Behalf via Graph using delegated auth.
- offline_access - Grants ISPBox permission to refresh tokens automatically — ensures the connection stays active without re-authentication.
- openid - Required for user authentication through Microsoft’s identity platform (OpenID Connect).
- profile - Allows access to basic profile information of the authenticated Microsoft 365 user.
- email - Grants access to the user’s primary email address for identity verification.
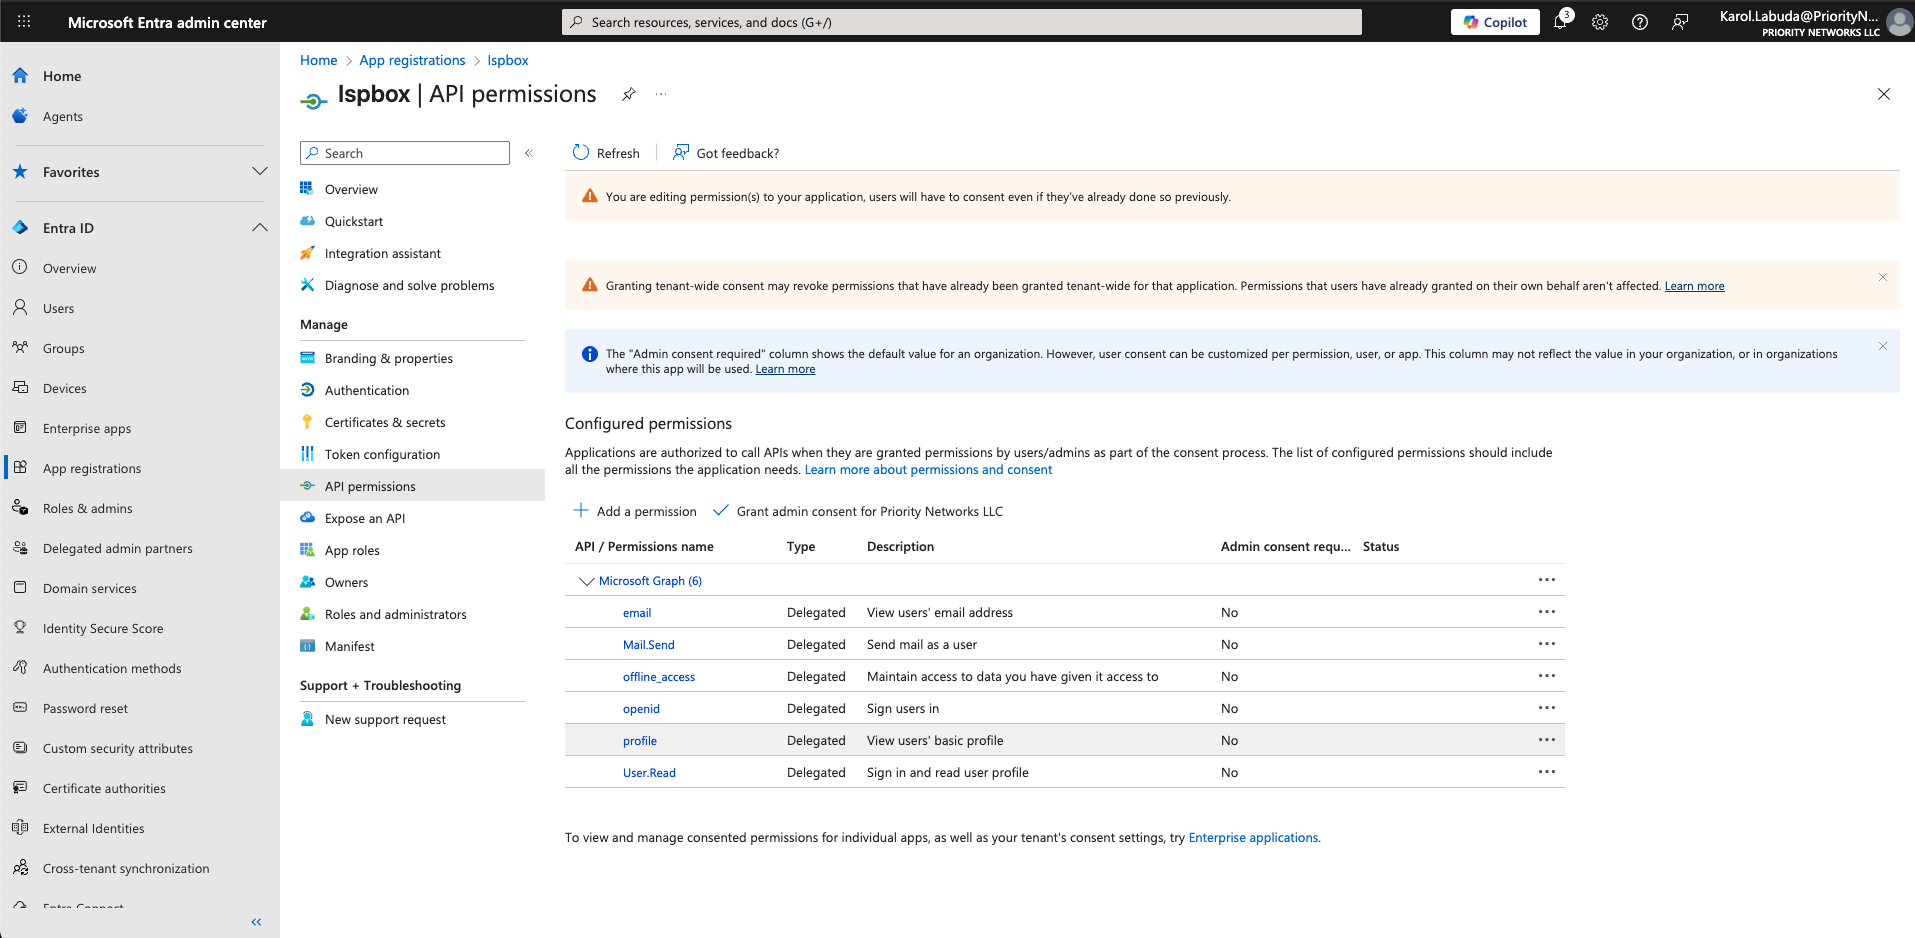
- Click Add permissions.
- Click Grant admin consent.
Step 5: Connect ISPBox
- Go to ISPBox -> Settings -> Mail.
- Click Connect Microsoft 365.
- Sign in and approve consent.
- After successful authorization, ISPBox can send through Outlook/Microsoft 365.
Optional: Send from a Shared Mailbox
If you want ISPBox to send as [email protected], grant your user Send As on that shared mailbox.
How to grant Send As:
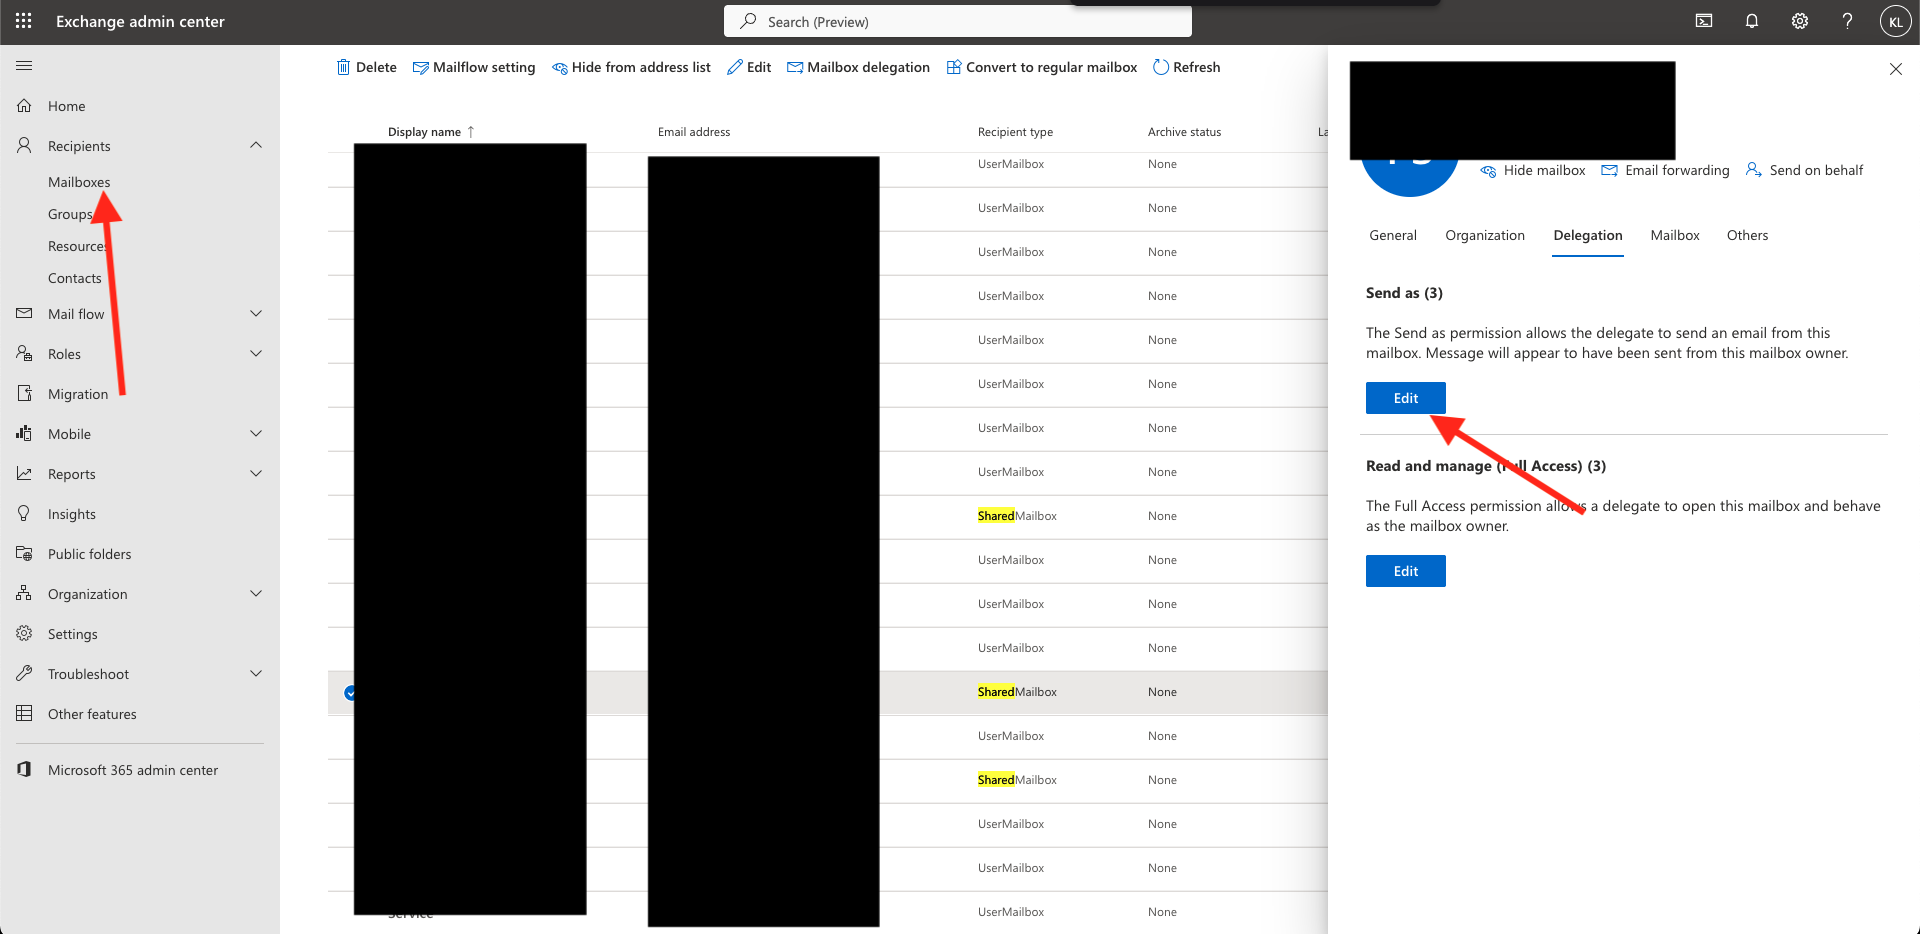
- Open Exchange Admin Center.
- Go to Recipients -> Mailboxes.
- Open the shared mailbox.
- Go to Delegation.
- Under Send as, click Edit -> Add your user -> Save.
Important notes:
- You need both Mail.Send and Mail.Send.Shared in the Entra app.
- Without Send As, messages may appear as: [email protected] on behalf of [email protected].
- With Send As, they are sent directly as: [email protected].
- Permission changes can take up to 60 minutes to propagate.


