How to Add a Router with WireGuard + API (MikroTik)
This guide explains the full flow to add a router using WireGuard tunnel and RouterOS API authentication in ISPBox.
1. What this setup does
With this method, ISPBox connects to your MikroTik through a WireGuard tunnel and manages service actions through RouterOS API.
You get:
- Secure tunnel communication (WireGuard).
- Router automation via API (DHCP or PPPoE workflows).
- Router health visibility in the Routers list (Online/Offline + latency).
2. Before you start
Prepare these items first:
- MikroTik reachable from ISPBox (directly or through WireGuard endpoint flow).
- RouterOS API enabled (default port 8728 unless changed).
- API user with enough rights for your selected auth type.
- Decide your auth model:
- DHCP - API for DHCP-based client access.
- PPPoE - API for PPPoE-based client access.
- Decide if ISPBox should:
- Generate WireGuard config for you (recommended), or
- Use your existing WireGuard keys.
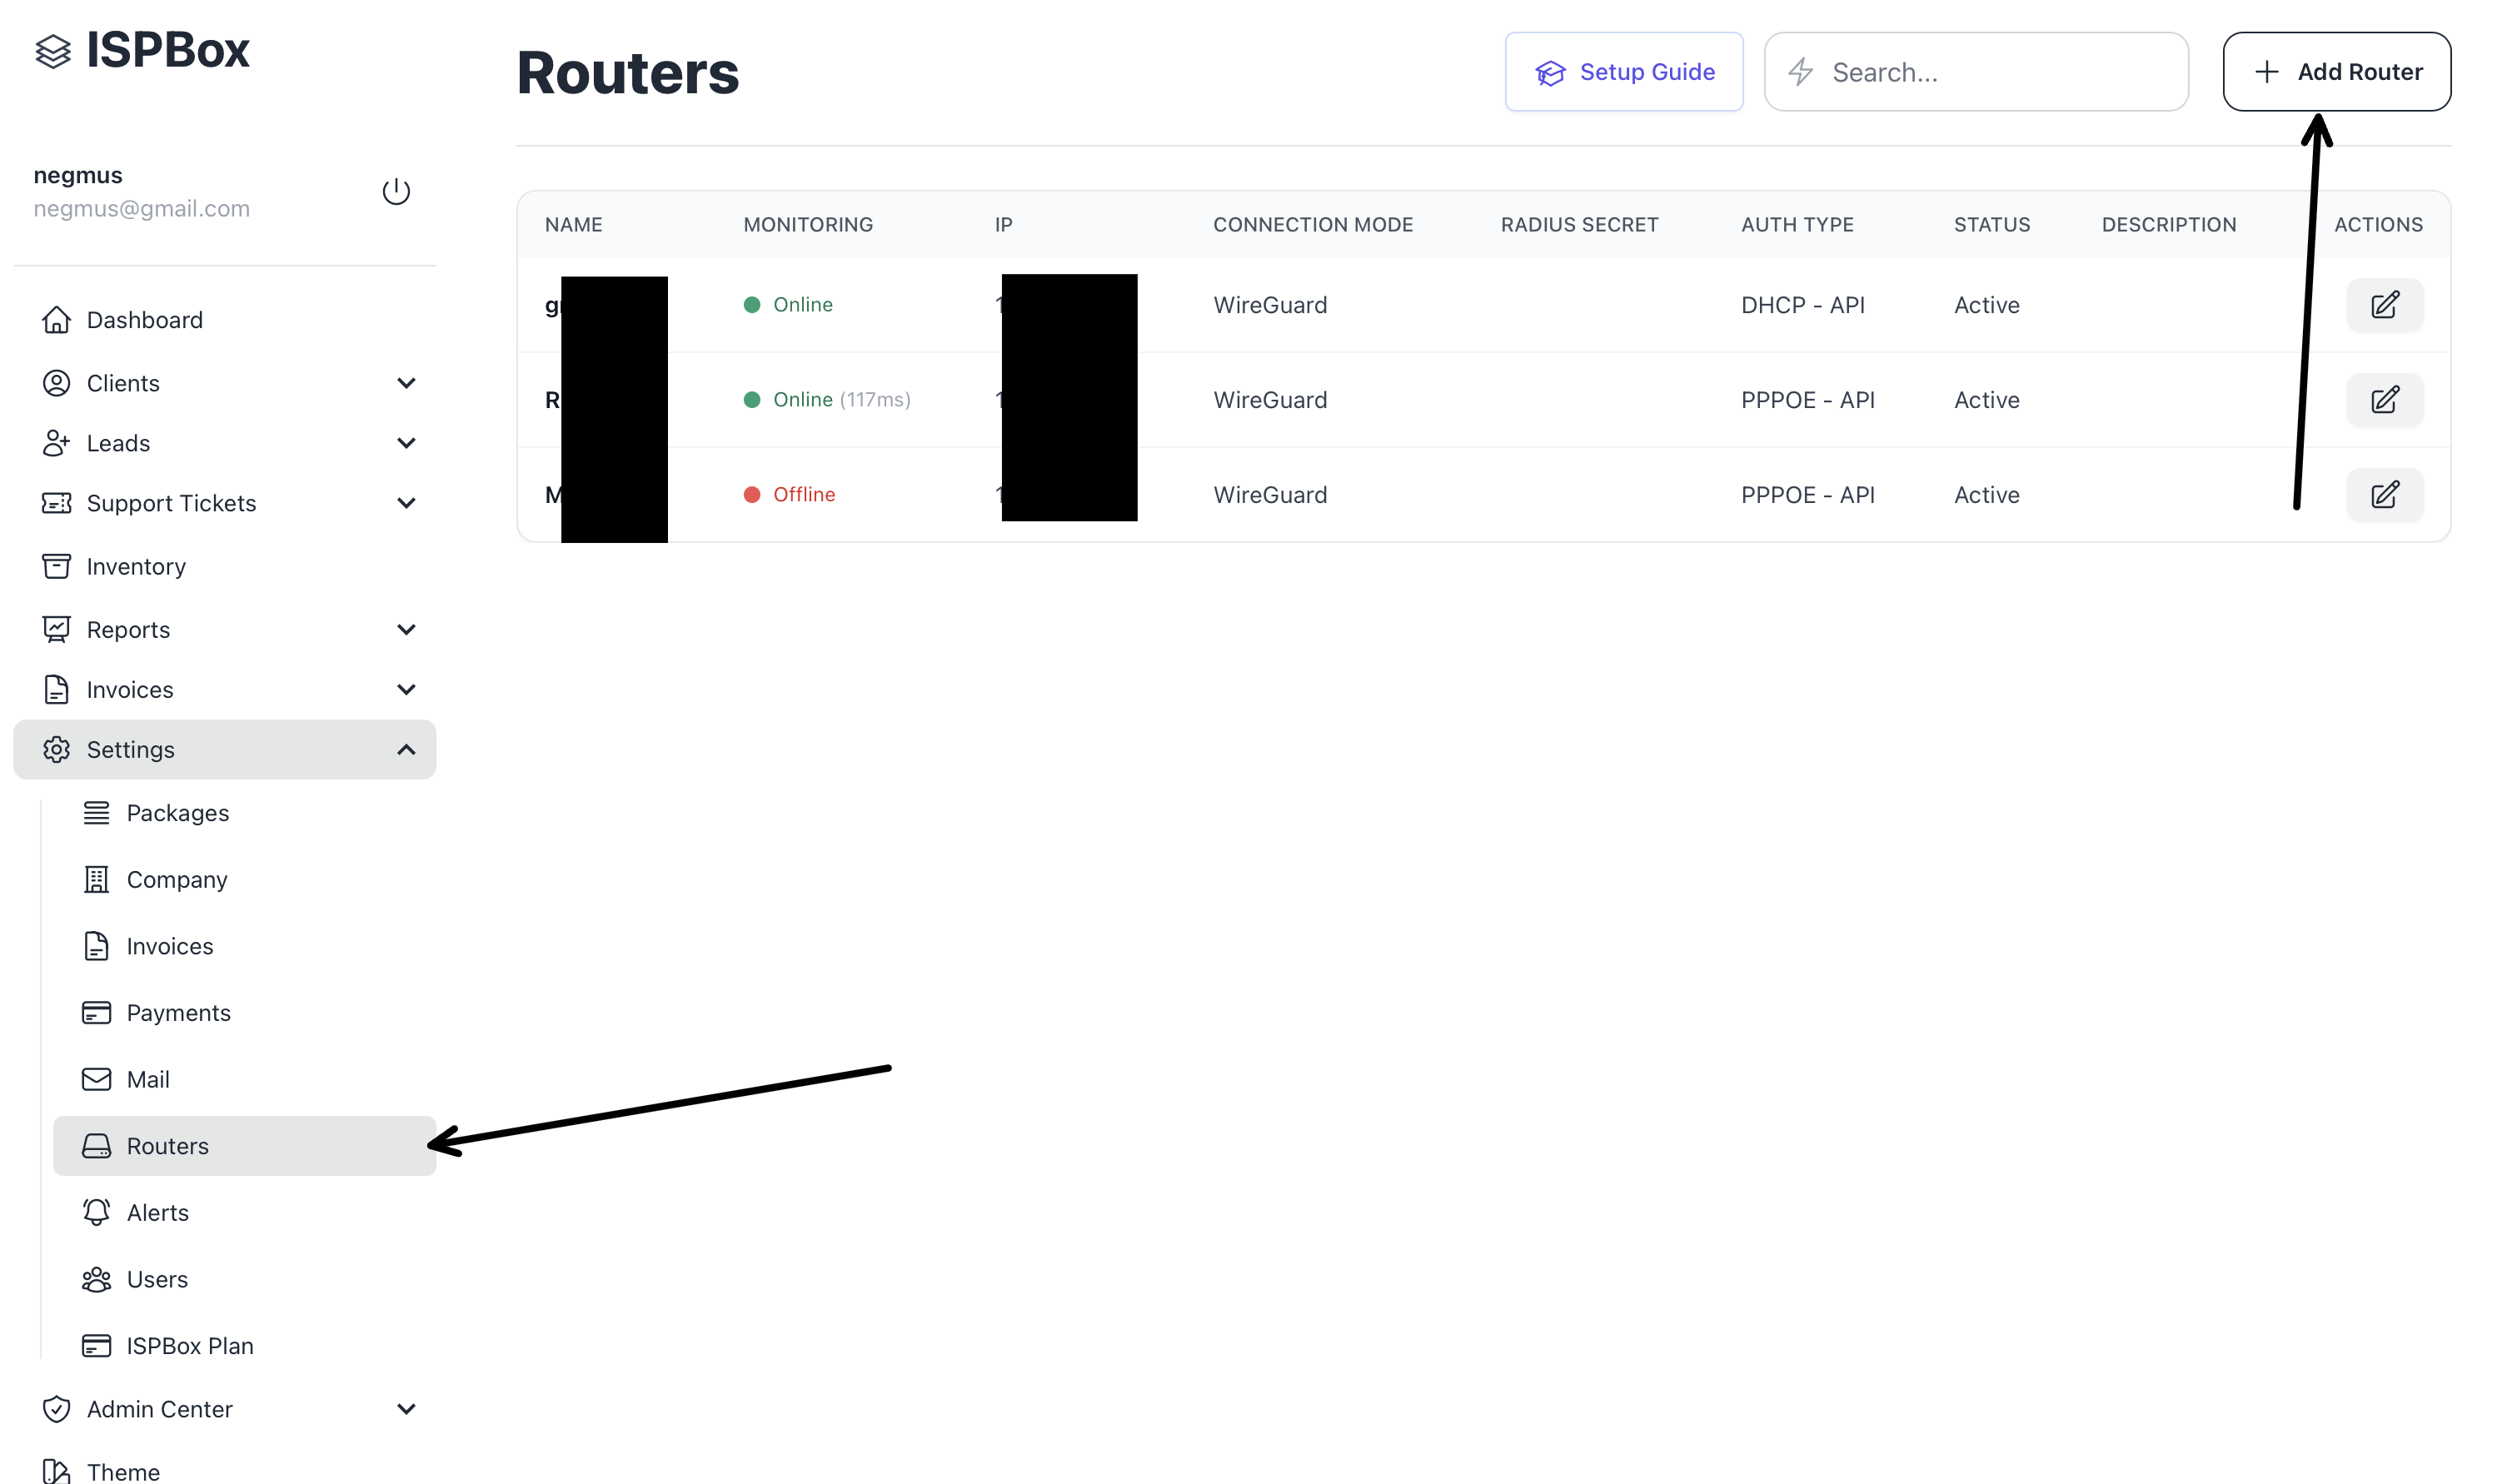
3. Open the Add Router form
- Go to Settings -> Routers.
- Click Add Router.
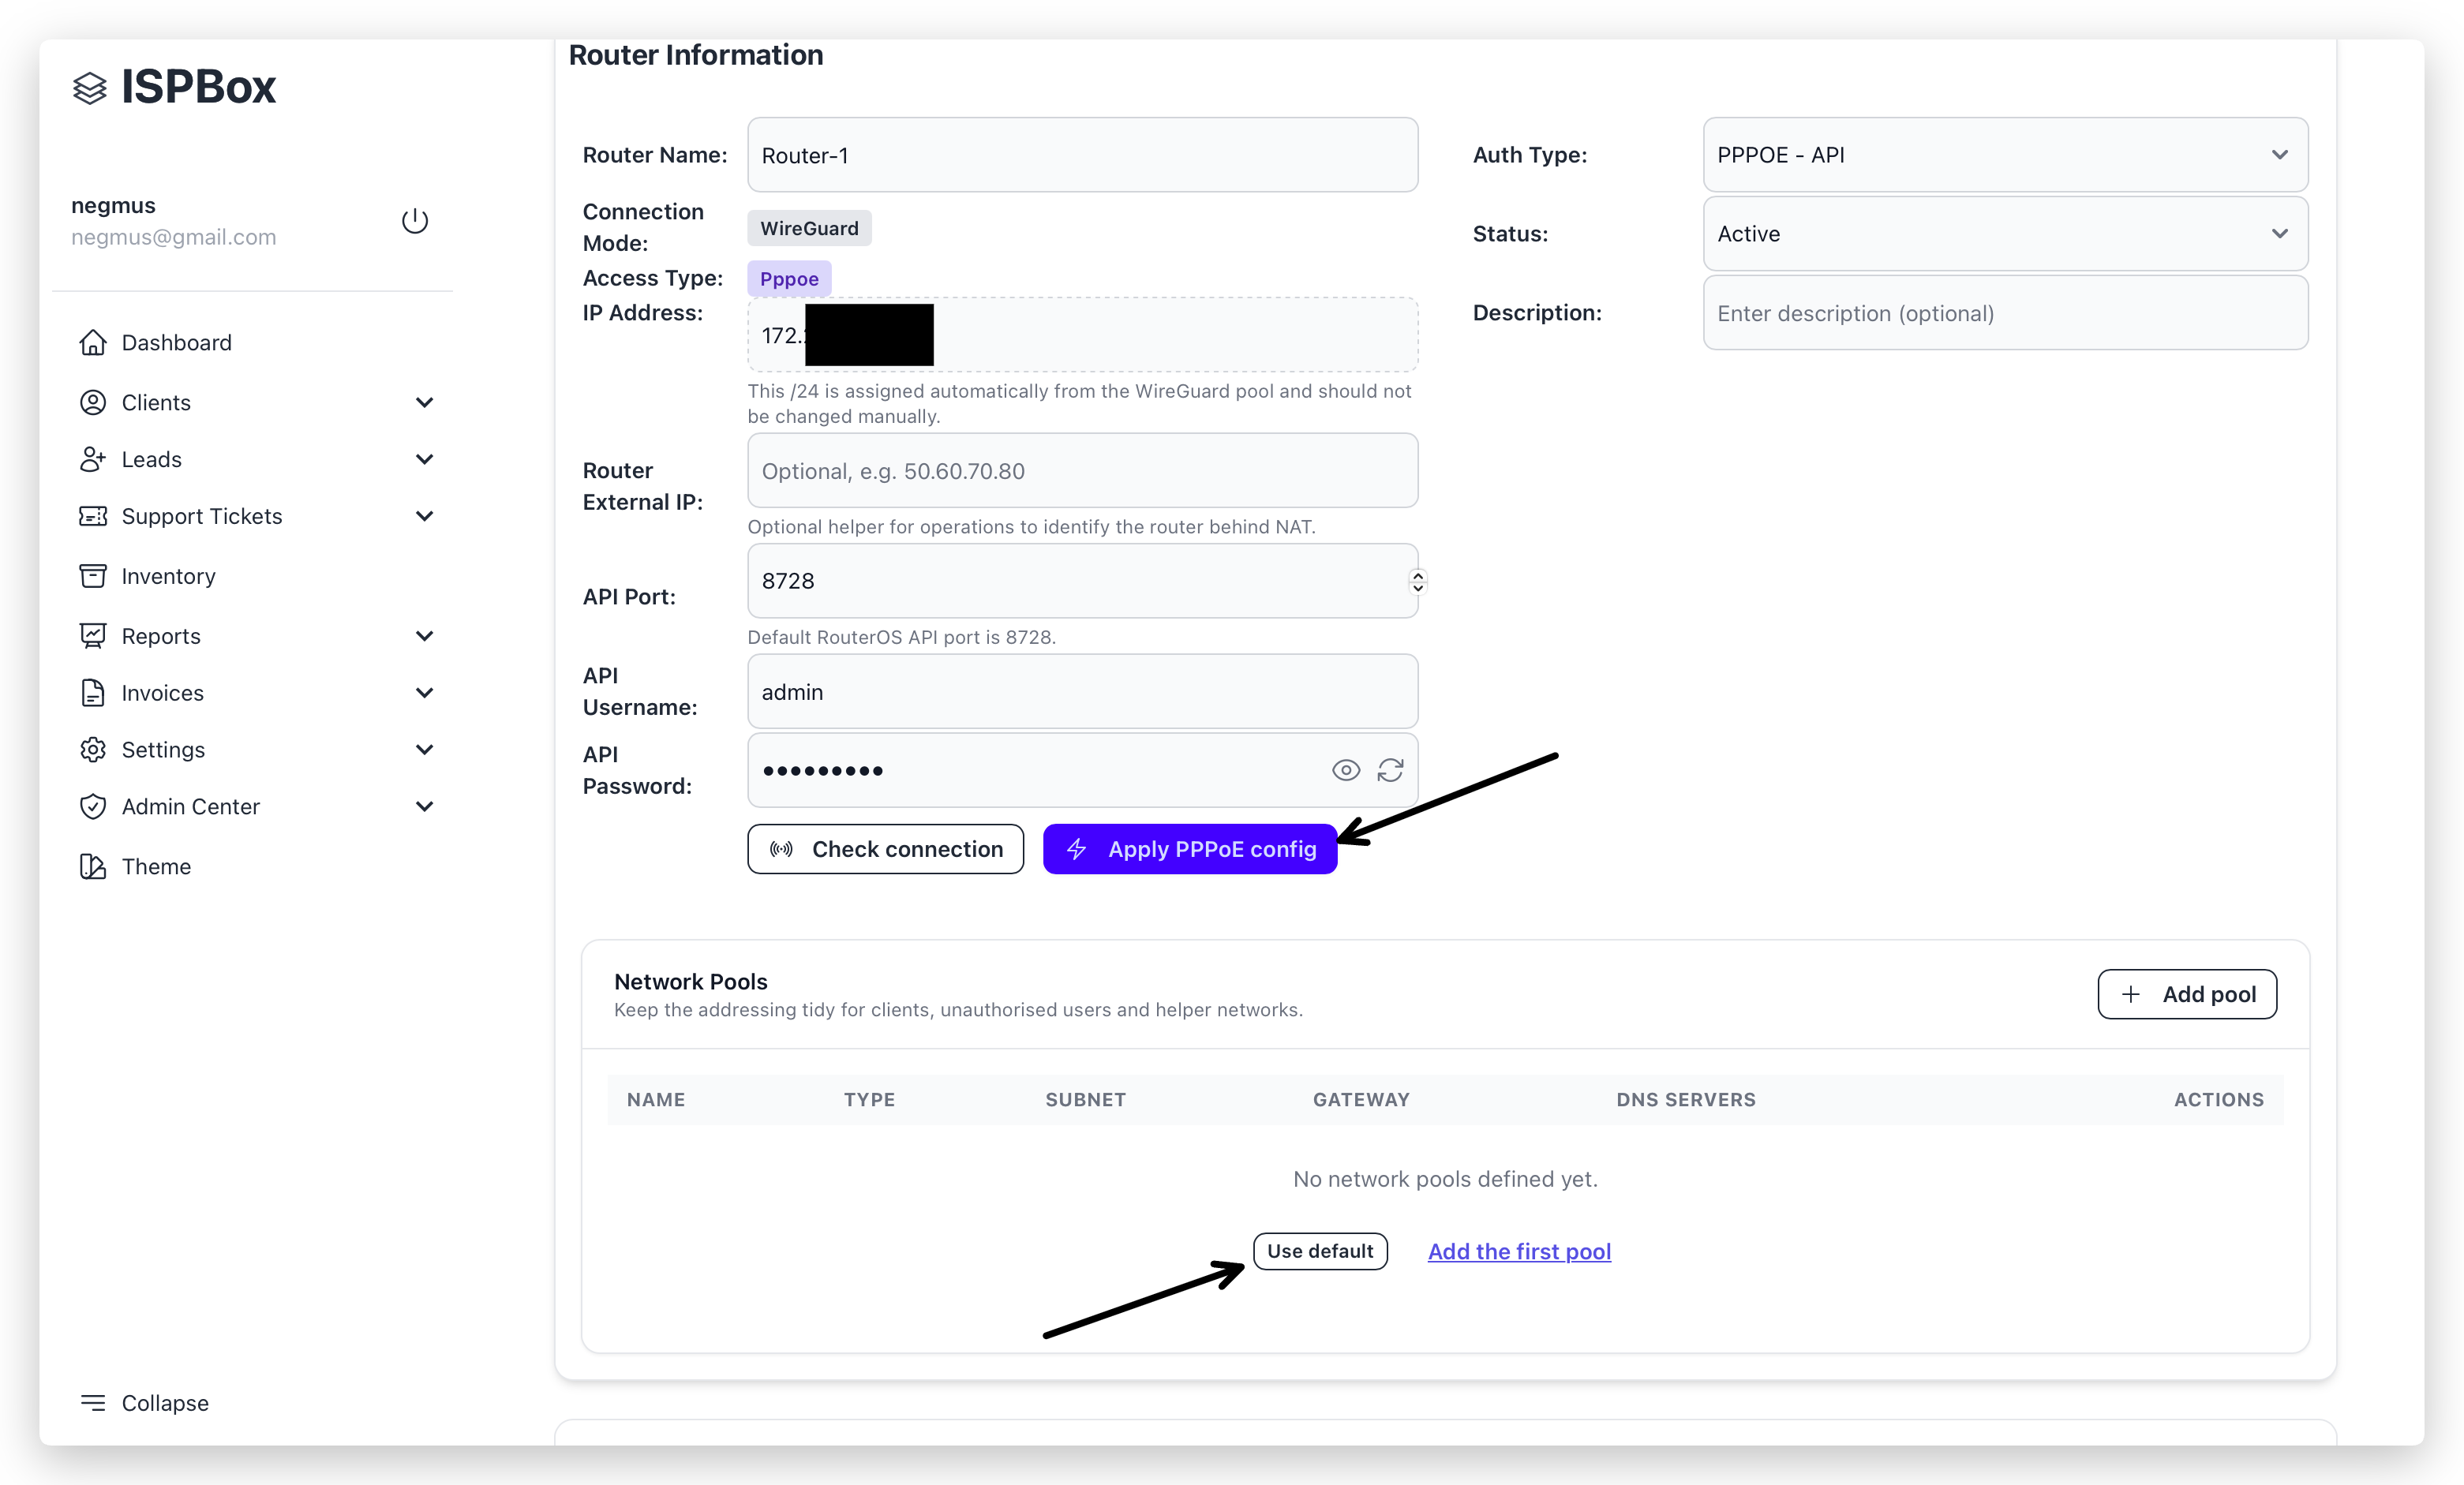
4. Fill Router Information (field-by-field)
- Router Name: Internal label in ISPBox (example: Router-1).
- Connection Mode: Select WireGuard Tunnel.
- Auth Type: Choose DHCP - API or PPPoE - API.
- Status: Active.
- Description: Optional operational note.
- Router External IP: Optional helper value for your team (especially when router is behind NAT).
- API Port: Default is 8728.
- API Username: RouterOS API account username.
- API Password: RouterOS API account password.
- Persistent Keepalive (s): Default 25; set 0 to disable.
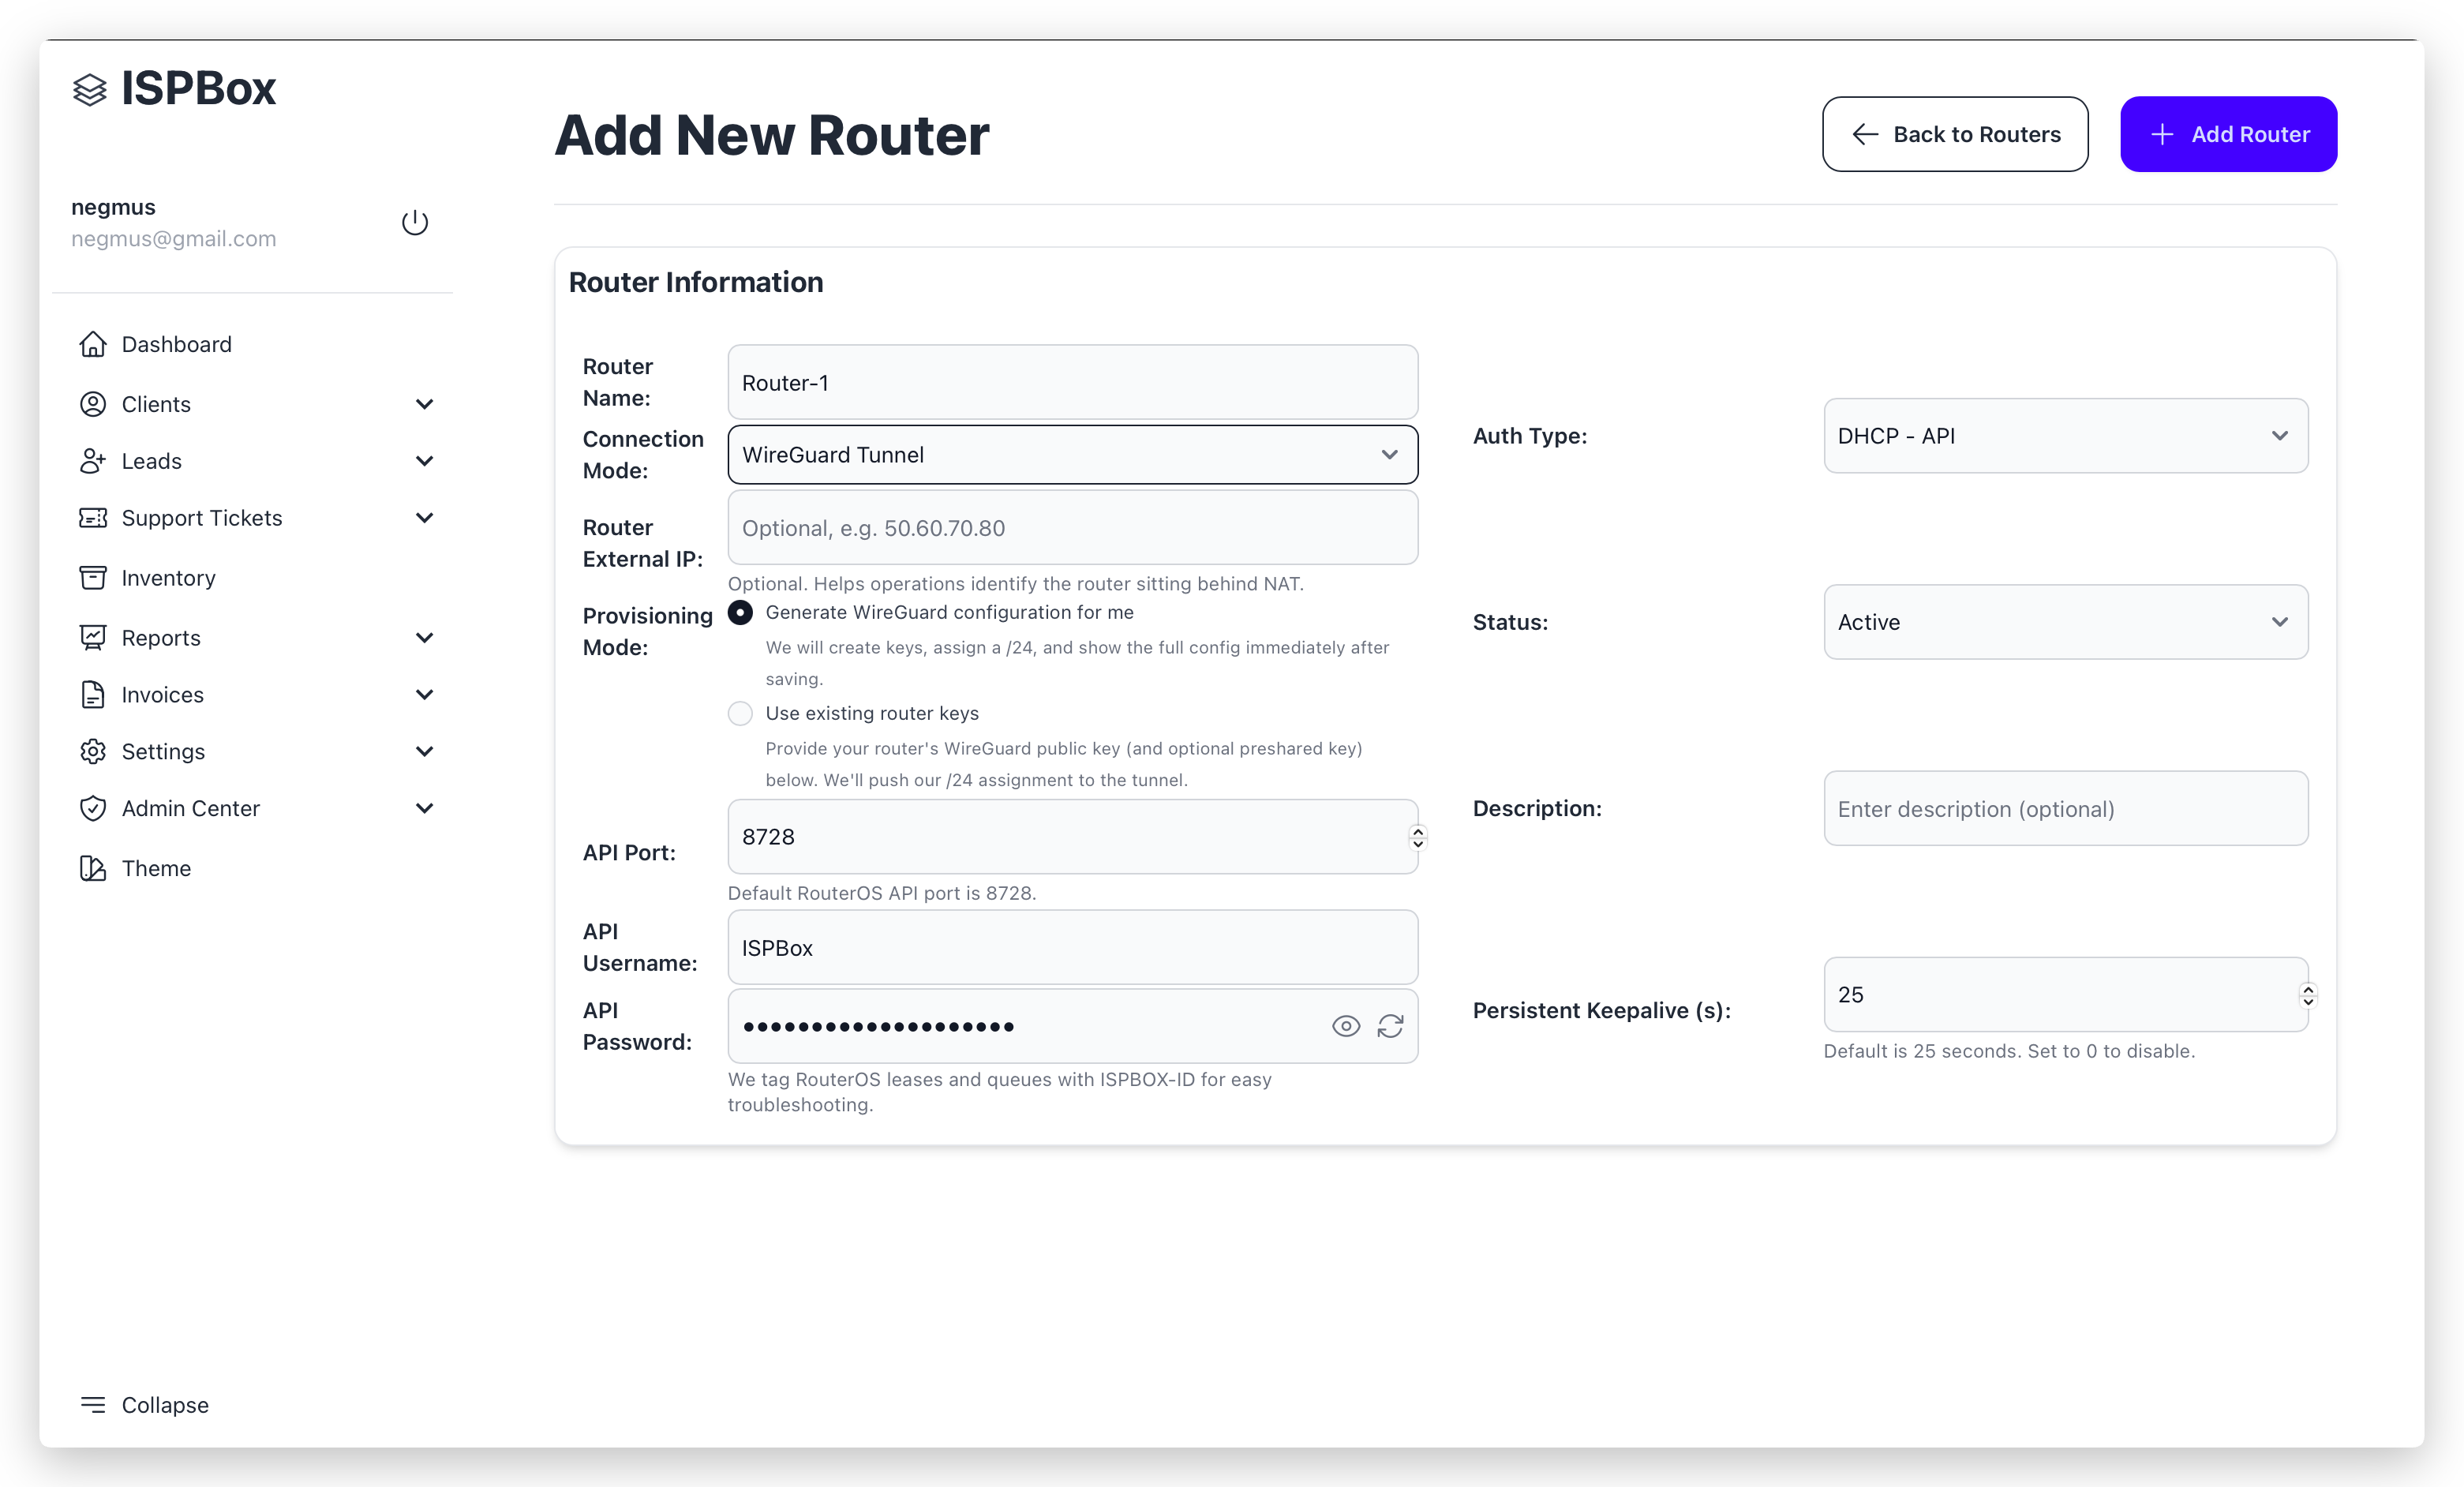
5. Choose Provisioning Mode (WireGuard)
When Connection Mode = WireGuard Tunnel, select how ISPBox should prepare the tunnel.
Option A: Generate WireGuard configuration for me (recommended)
Choose this if you want ISPBox to create the WireGuard peer automatically.
After you save the router, ISPBox generates:
- Assigned Tunnel IP
- Endpoint Host and Port
- Allowed IPs
- Preshared Key (if enabled)
- Router Public Key
- Client Configuration block
Important:
After adding the router, scroll to the bottom of the page to WireGuard Tunnel Details.
In the MikroTik CLI Helper box, you will find ready-to-use copy/paste commands to configure WireGuard on your MikroTik.
Option B: Use existing router keys
Choose this if your MikroTik already has WireGuard keys and you want to reuse them.
You provide:
- Router Public Key
- Optional Preshared Key (PSK)
ISPBox then maps this router to the tunnel assignment and shows the tunnel details after save.
Important:
After saving, go to the bottom section (WireGuard Tunnel Details) and use the displayed values to verify your existing setup.
If needed, use the MikroTik CLI Helper commands as a reference for the expected WireGuard configuration.
6. Save router and validate connection
- Click Add Router (top-right).
- On the router detail page, click Check connection.
- Confirm router appears as Online in Routers list.
If check fails, verify:
- API port/user/password.
- API service enabled on MikroTik.
- Firewall rules allowing API/WireGuard traffic.
- Correct endpoint/routing.
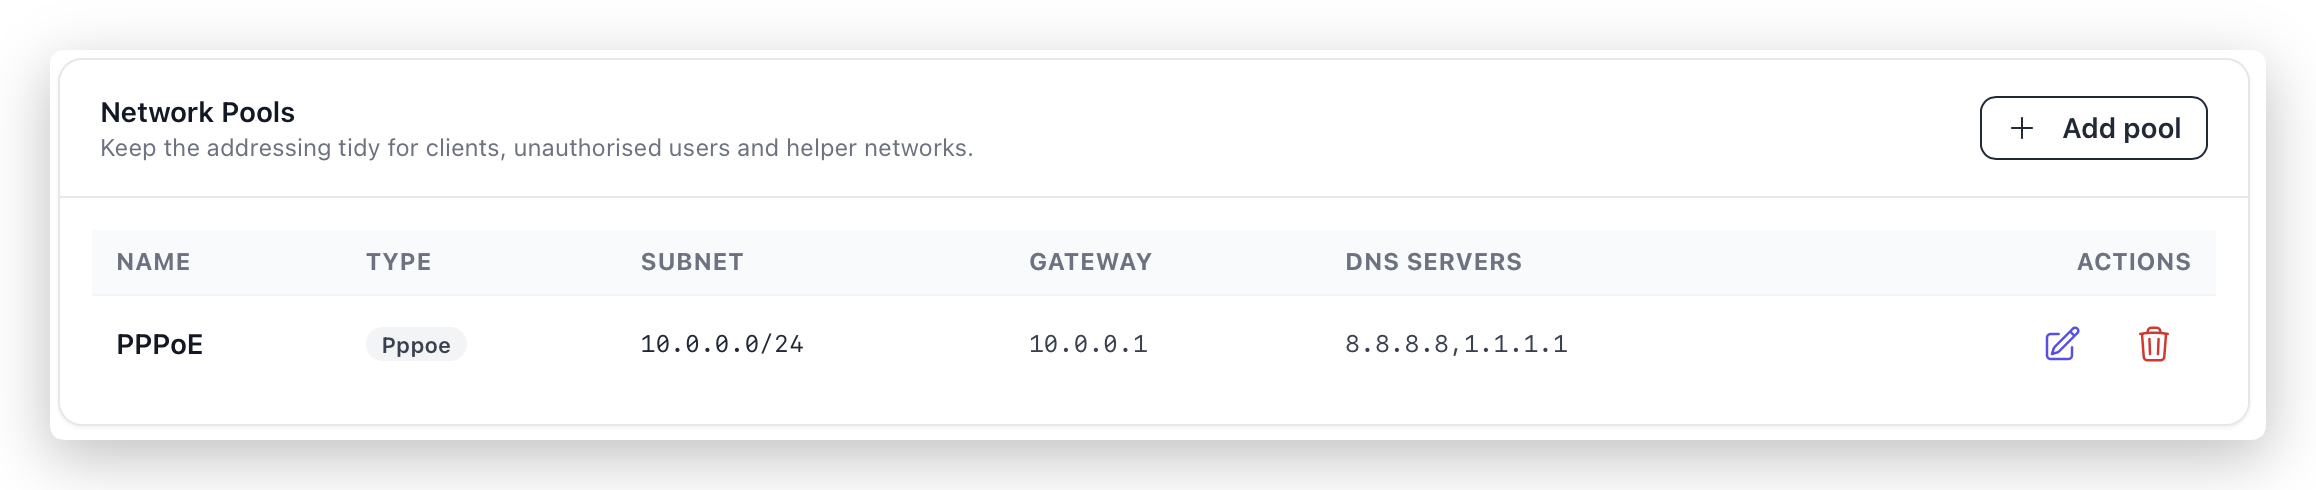
7. Configure Network Pools
In Network Pools, define addressing used for client services.
Typical patterns from your UI:
- For PPPoE: one client pool (example 10.0.0.0/24, gateway 10.0.0.1).
- For DHCP setups: usually separate pools like Clients and Unauthorised.
You can:
- Click Use default for quick baseline.
- Click Add pool for custom design.
- Edit/Delete pools with action icons.
Pool quality matters because service provisioning and access behavior depend on these ranges.

8. Apply first router config
After API credentials and pools are ready:
- Click Apply first config (or Apply PPPoE config when on PPPoE auth).
This action pushes initial required objects for the selected mode to MikroTik.
Use it after confirming:
- API credentials are valid.
- WireGuard tunnel values are correct.
- Pools are defined as intended.
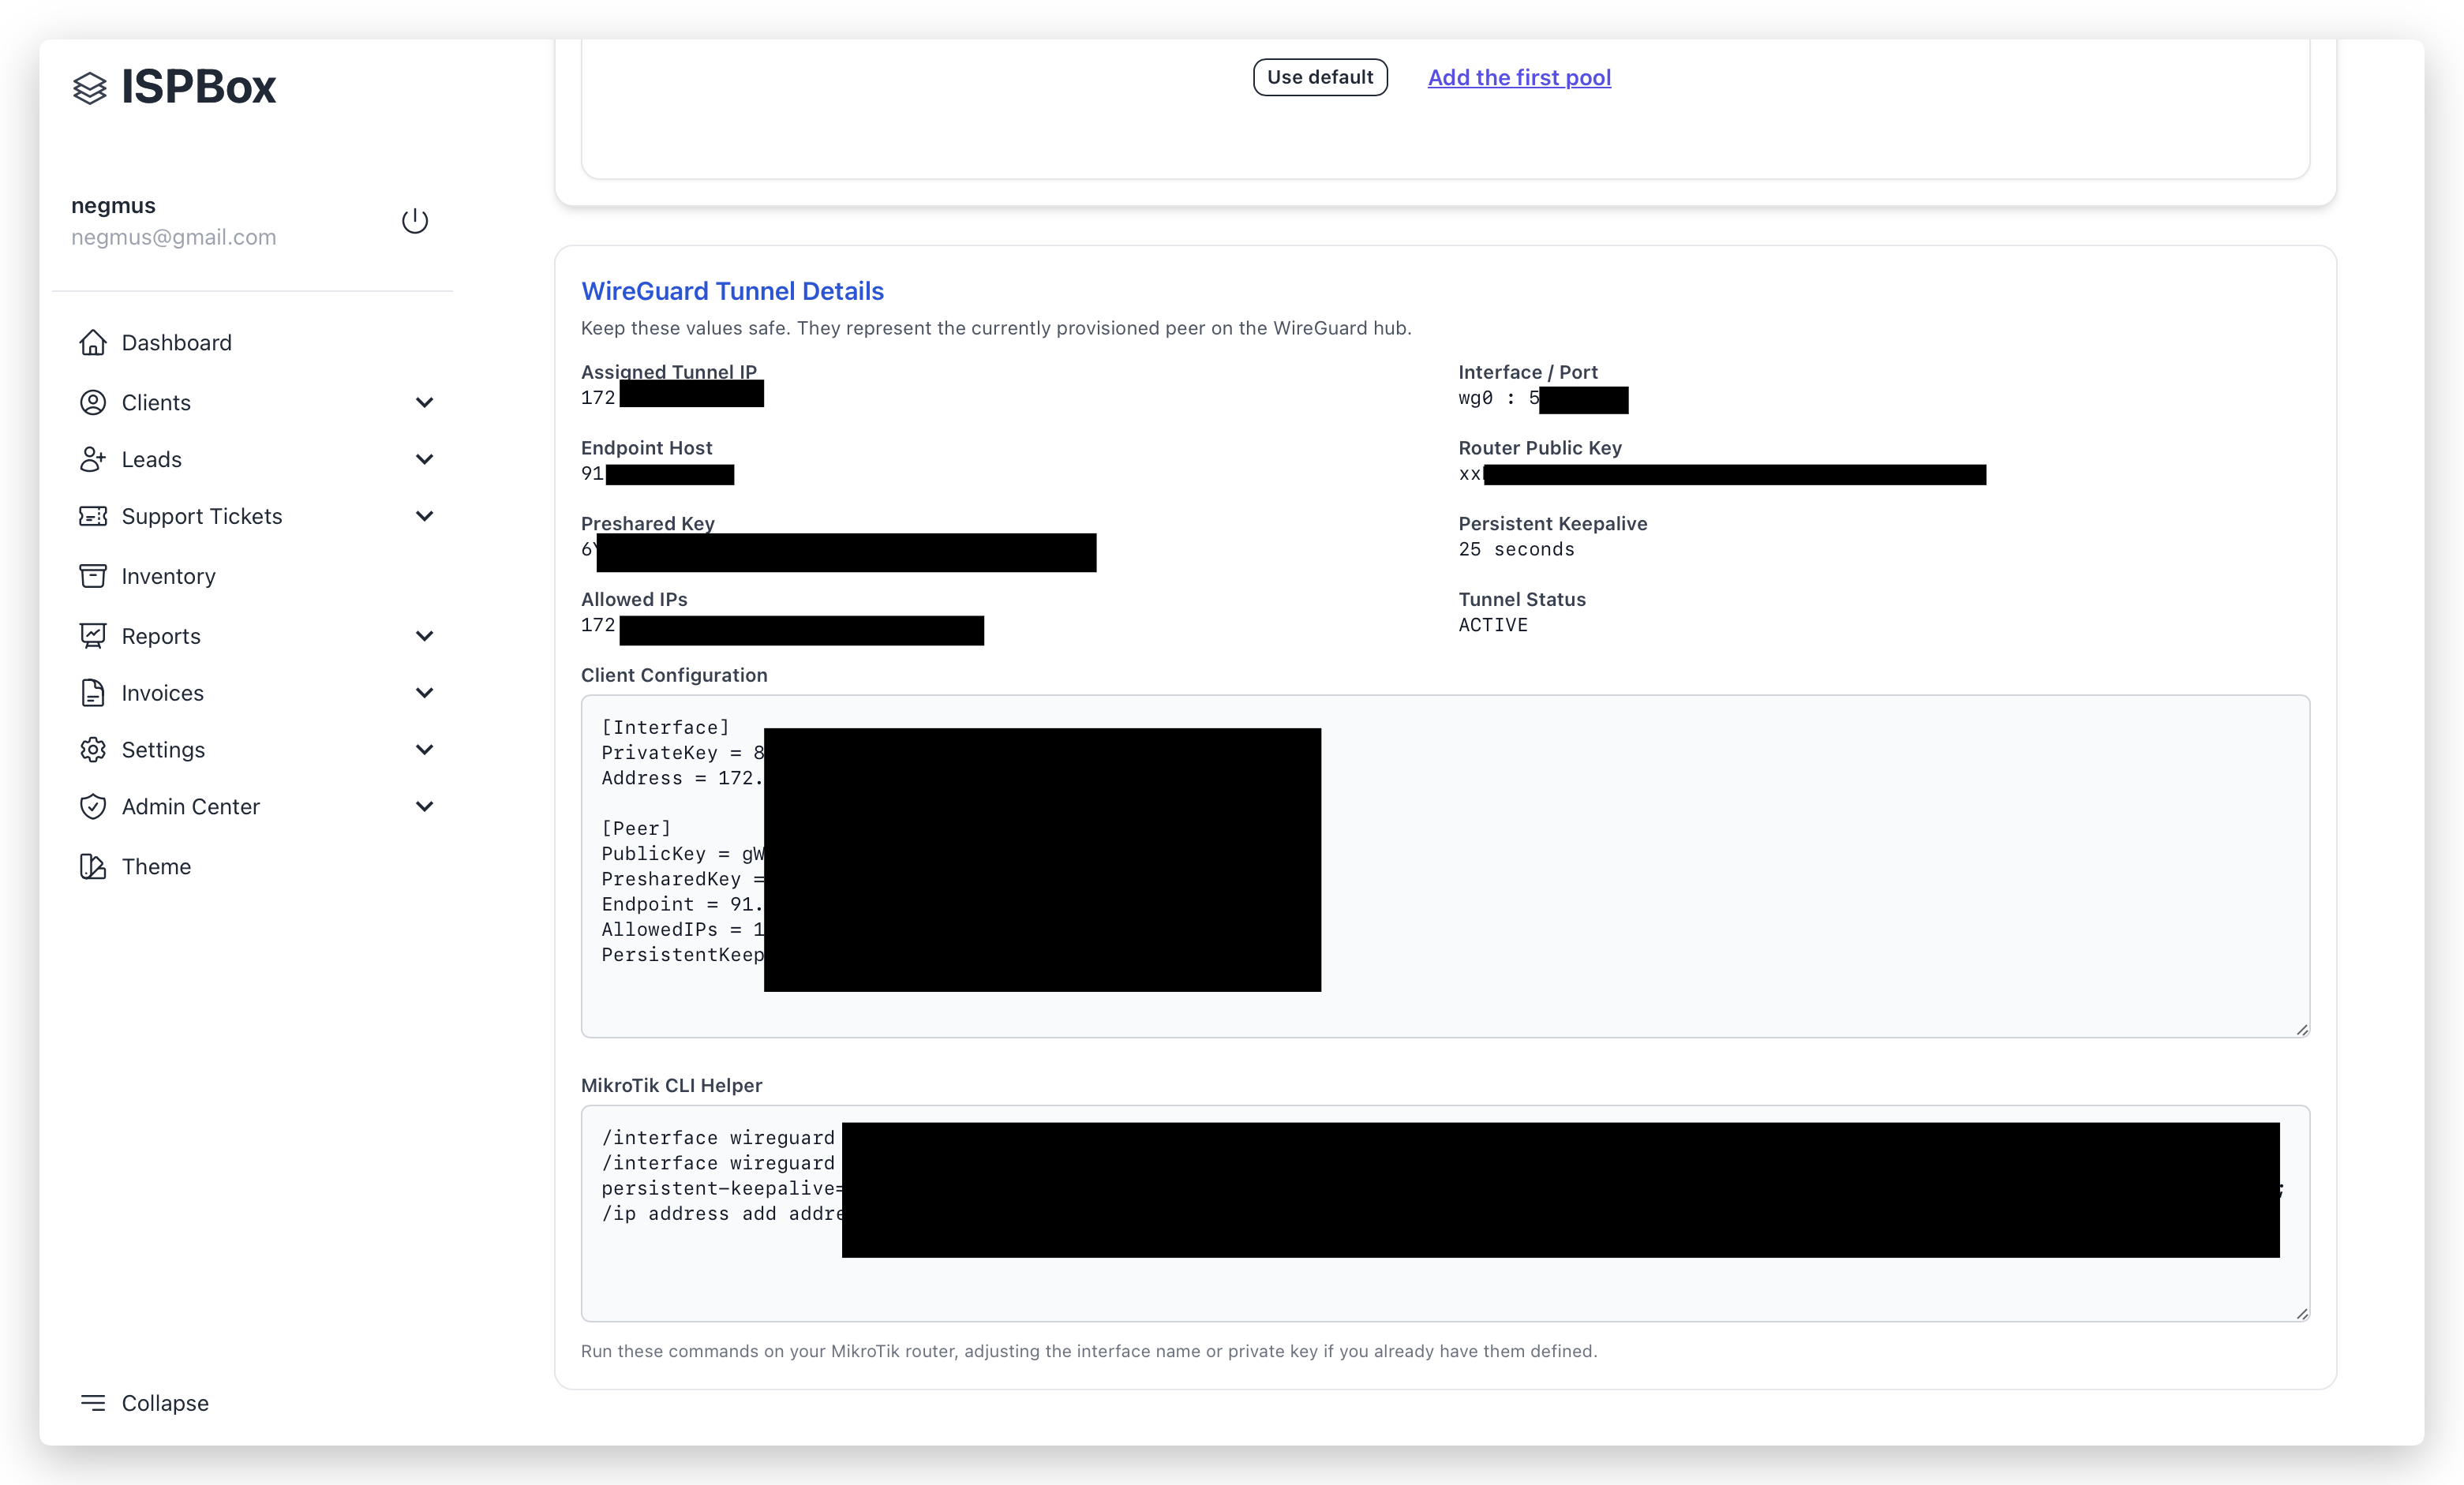
9. Understand WireGuard Tunnel Details section
After provisioning, this section shows the active tunnel peer data:
- Assigned Tunnel IP: Router peer address inside WG design.
- Interface / Port: WireGuard interface and listener port.
- Router Public Key: Key used for peer identity.
- Endpoint Host: Where router should connect.
- Allowed IPs: Networks routed through this peer.
- Persistent Keepalive: Keepalive interval.
- Tunnel Status: Current peer state.
- Client Configuration: Ready WG config block.
- MikroTik CLI Helper: Commands you can paste into RouterOS terminal.
Treat keys and config as sensitive credentials.
10. Final verification checklist
- Router status in list is Online.
- Check connection succeeds.
- Network pools match your service plan.
- First config applied without errors.
- Test one real client service activation through this router.
11. Common mistakes to avoid
- Wrong API credentials or wrong API port.
- Forgetting to allow API/WG traffic in firewall.
- Creating overlapping or invalid pools.
- Applying first config before pools are set.
- Editing auto-assigned WireGuard IP manually when system says not to.
- Using insufficient RouterOS user permissions.


